John Lawrence
Active member
Welcome to September! September always means the start of Fall to me, even though it's going to be 92 here in Pittsburgh today. The evenings are cooling off nicely and a few leaves are beginning to turn around here. So the promise of Autumn is there.
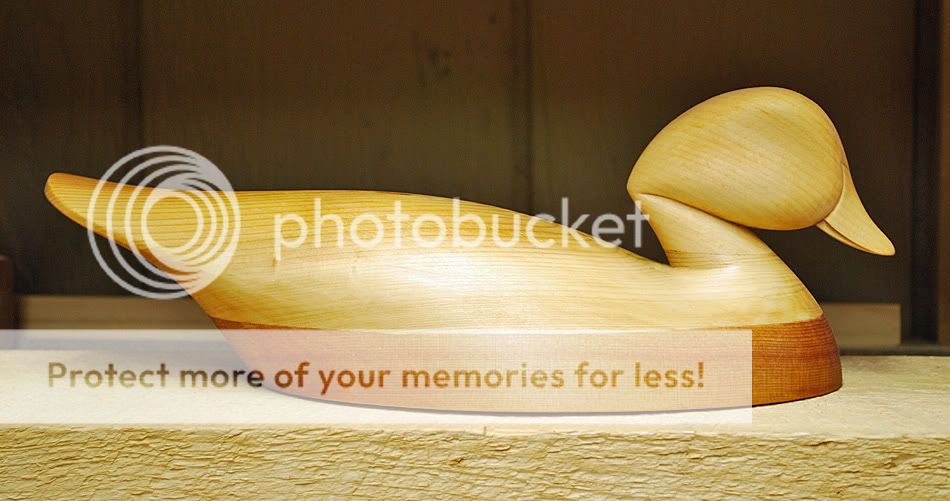
First I have a sleeping Mallard drake to show this month. Last summer I took an order from a new customer for a sleeping black duck. I started the decoy and then the guy backed out on the order a couple of weeks later. Unfortunately that happens sometimes in the custom decoy business. So I decided to finish it for my own use. I added exposed wings on both sides and worked on it whenever I had a little extra time. Somewhere around the middle of last summer I saw some advanced photos from Keith's book and there was a picture of a sleeping hen black duck in almost the exact same pose except my decoy's head was on the other side. Now the issue of copying some one's work is one that I'm very sensitive too. It goes on much too often in the decoy world and with the internet it's fairly easy to track who does it regularly, and it's something that will eventually damage your reputation. So accordingly I lost all interest in that decoy for about six months.
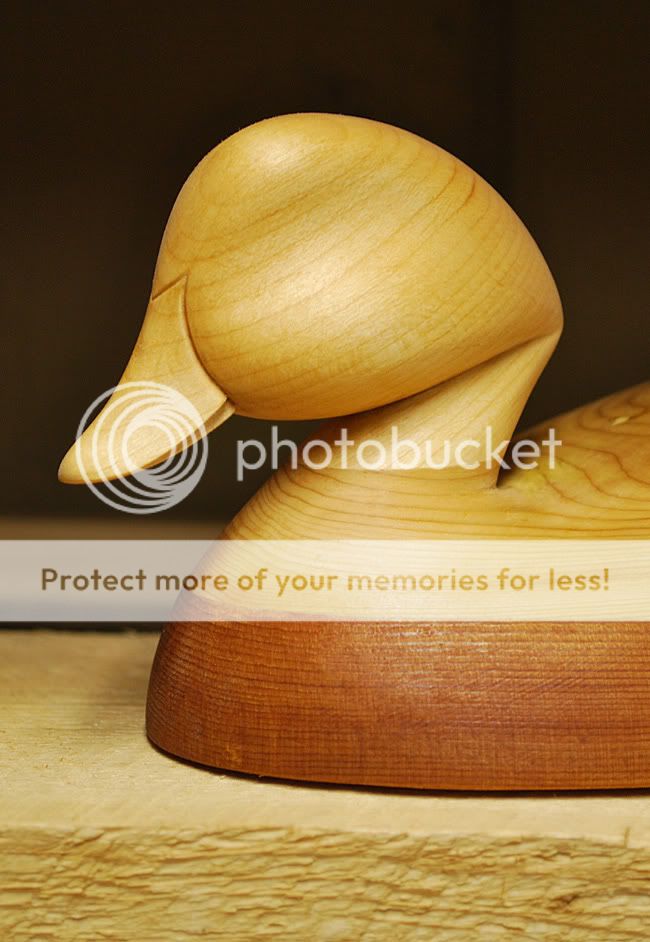
Around Christmas I found it again sitting on one of my work tables and I though I heard him whisper to me " I'm really a mallard". One day when I had a little bit of time I heard him a little louder saying he wanted to be a mallard so I picked up a knife and started to reshape the head and neck. I see a mallard's head from the side as squarer that a black duck's so I changed the profile and the slope of the neck to change mine away from what Keith's looked like. Westlake started to get close so I put it down again for awhile.
In March at the Westlake show I told the story of this still unfinished decoy to Keith and told me told finish it as a black duck it would be okay with him. But still it just was too close to his and it just didn't set right with me.
Around the beginning of June I happened to find it again near the top of some unfinished decoys and I just wasn't sure if it said Mallard to me so I thought about finishing it as a mallard hen for about a week. But every time I went to the basement he kept telling me that "I'm a mallard, a mallard drake by the way". But since I had originally started this decoy as a black duck I hadn't left enough room for tail curls. But one of my favorite antique decoys that I look at on the web regularly is an early Charlie Joiner drake mallard that doesn't have tail curls either. Once again the decoy talked to me one day but this time he said rather pointedly " I want to be a mallard drake" an then I heard him say " You are the No Rules guy right? Make me the way you want to" So that was it he became a sleeping mallard drake without tail curls.
I started showing you all the painting process last month but working with that cell phone camera just didn't cut it. And after the second glaze on the head the time came to ride hard and fast because I was seeing the colors and I was able to figure out how to make them. So I finished the head painting without any additional photos. One thing I tried on this decoy that was different was to paint everything in front of the rump area without using any black paint. You know after you've made 700 or 800 decoys you have to start looking for ways to keep thing fresh and interesting. Most of the blacks that you see were made from mixes of blues, browns and purples except for the head where I used Thalo Green and Alizarin Crimson. Once again this decoy is hollowed cedar and painted in oils.
View attachment P8290076.JPG
View attachment P8290077.JPG
View attachment P8290079.JPG
View attachment P8290080.JPG
View attachment P8280064.JPG
First I have a sleeping Mallard drake to show this month. Last summer I took an order from a new customer for a sleeping black duck. I started the decoy and then the guy backed out on the order a couple of weeks later. Unfortunately that happens sometimes in the custom decoy business. So I decided to finish it for my own use. I added exposed wings on both sides and worked on it whenever I had a little extra time. Somewhere around the middle of last summer I saw some advanced photos from Keith's book and there was a picture of a sleeping hen black duck in almost the exact same pose except my decoy's head was on the other side. Now the issue of copying some one's work is one that I'm very sensitive too. It goes on much too often in the decoy world and with the internet it's fairly easy to track who does it regularly, and it's something that will eventually damage your reputation. So accordingly I lost all interest in that decoy for about six months.
Around Christmas I found it again sitting on one of my work tables and I though I heard him whisper to me " I'm really a mallard". One day when I had a little bit of time I heard him a little louder saying he wanted to be a mallard so I picked up a knife and started to reshape the head and neck. I see a mallard's head from the side as squarer that a black duck's so I changed the profile and the slope of the neck to change mine away from what Keith's looked like. Westlake started to get close so I put it down again for awhile.
In March at the Westlake show I told the story of this still unfinished decoy to Keith and told me told finish it as a black duck it would be okay with him. But still it just was too close to his and it just didn't set right with me.
Around the beginning of June I happened to find it again near the top of some unfinished decoys and I just wasn't sure if it said Mallard to me so I thought about finishing it as a mallard hen for about a week. But every time I went to the basement he kept telling me that "I'm a mallard, a mallard drake by the way". But since I had originally started this decoy as a black duck I hadn't left enough room for tail curls. But one of my favorite antique decoys that I look at on the web regularly is an early Charlie Joiner drake mallard that doesn't have tail curls either. Once again the decoy talked to me one day but this time he said rather pointedly " I want to be a mallard drake" an then I heard him say " You are the No Rules guy right? Make me the way you want to" So that was it he became a sleeping mallard drake without tail curls.
I started showing you all the painting process last month but working with that cell phone camera just didn't cut it. And after the second glaze on the head the time came to ride hard and fast because I was seeing the colors and I was able to figure out how to make them. So I finished the head painting without any additional photos. One thing I tried on this decoy that was different was to paint everything in front of the rump area without using any black paint. You know after you've made 700 or 800 decoys you have to start looking for ways to keep thing fresh and interesting. Most of the blacks that you see were made from mixes of blues, browns and purples except for the head where I used Thalo Green and Alizarin Crimson. Once again this decoy is hollowed cedar and painted in oils.
View attachment P8290076.JPG
View attachment P8290077.JPG
View attachment P8290079.JPG
View attachment P8290080.JPG
View attachment P8280064.JPG
Last edited: