Steve Sanford
Well-known member
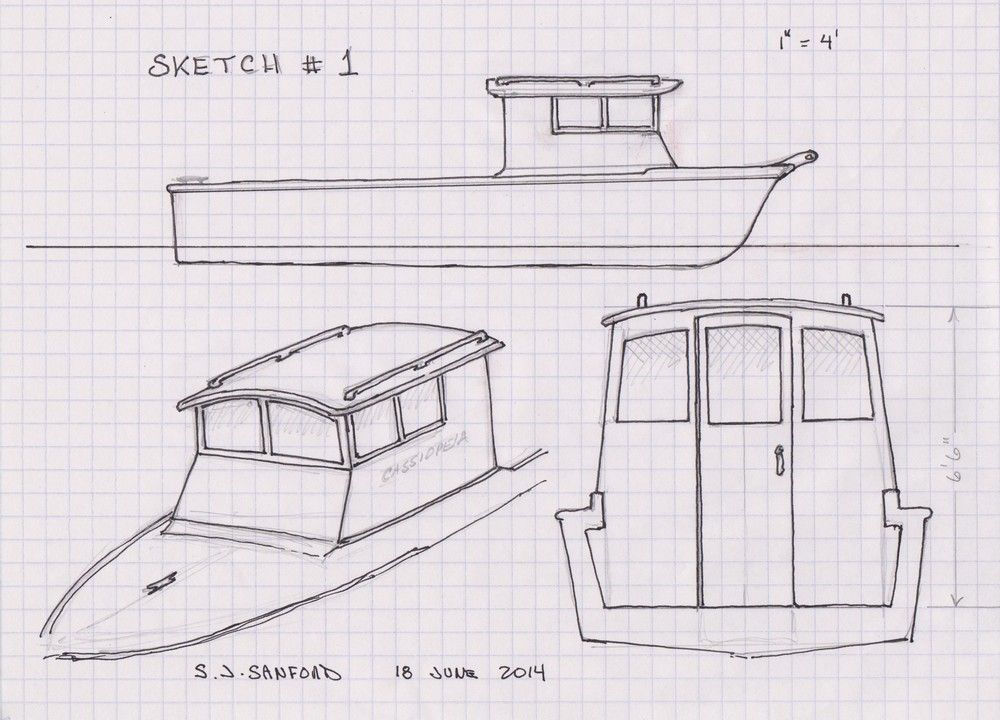
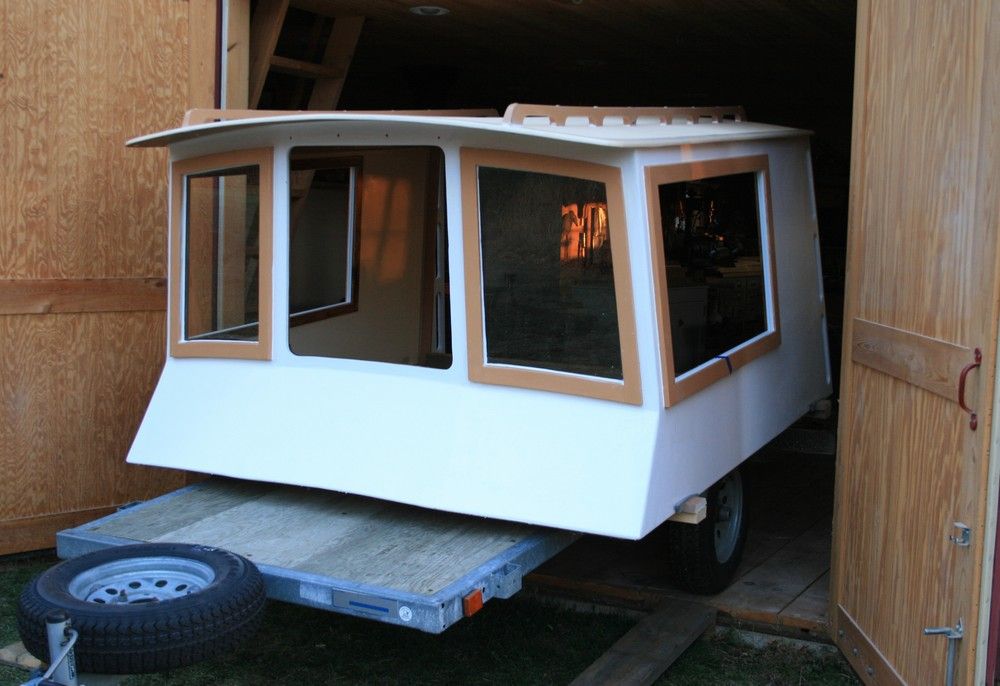
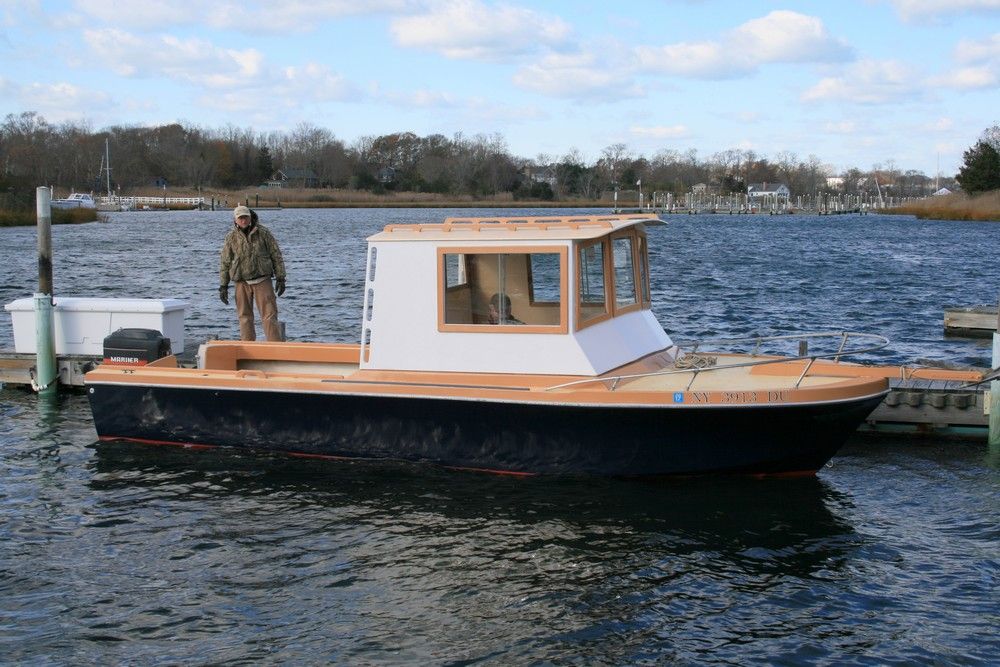
This project has consumed much of my time over the past couple of months - and I am enjoying every minute. I have been building a pilothouse - and a bunch of other "appurtenant features" for good friend Craig Kessler's 25-foot T-Craft that he inherited from his Dad.
Our purpose is to convert an open vessel into a mother ship/tender for open bay gunning - as well as for a host of other waterborne adventures throughout the year. As with any such project, it began by giving the boat a good look - and arriving at a conceptual design.
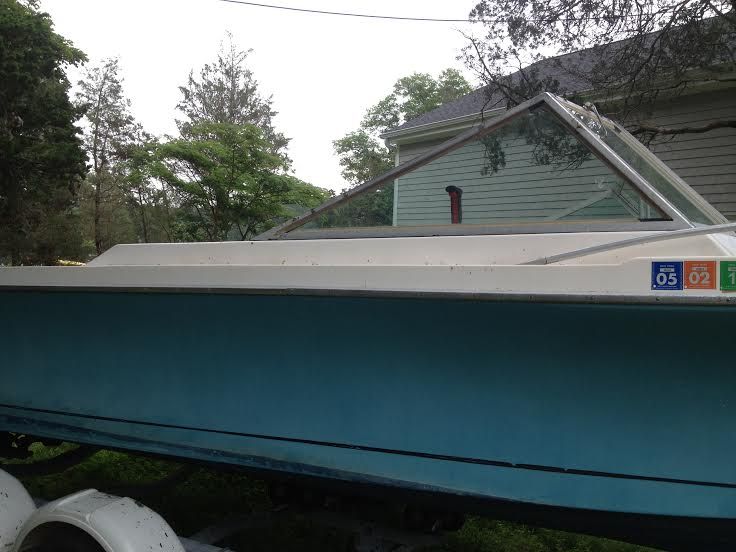
Actually, the first step was a phone call from Craig - reporting that the 150 Merc (Mariner?) was functional - his Dad had put it away carefully about 6 years earlier. Craig then sent me a couple of photos.
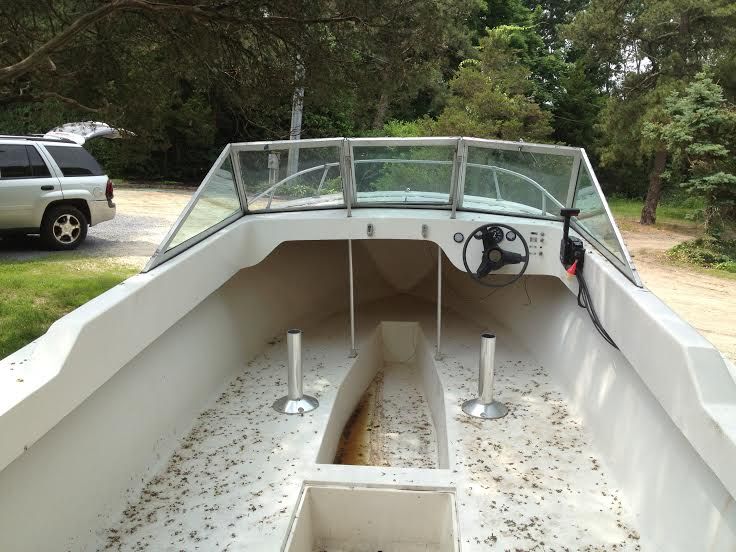
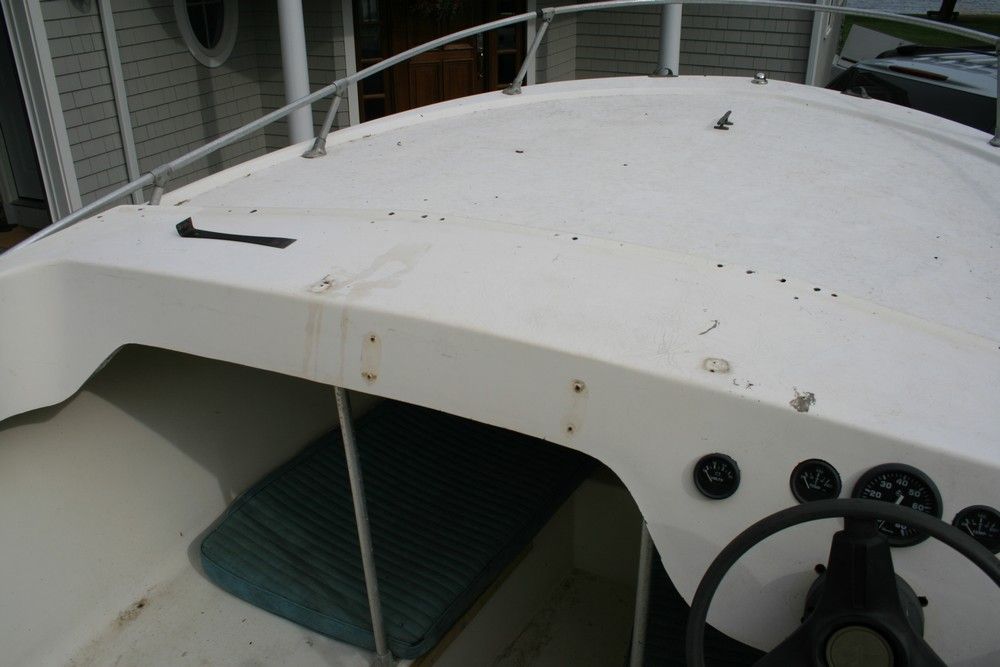
The raised coaming around the forward end of the cockpit provides an obvious foundation for a pilothouse.
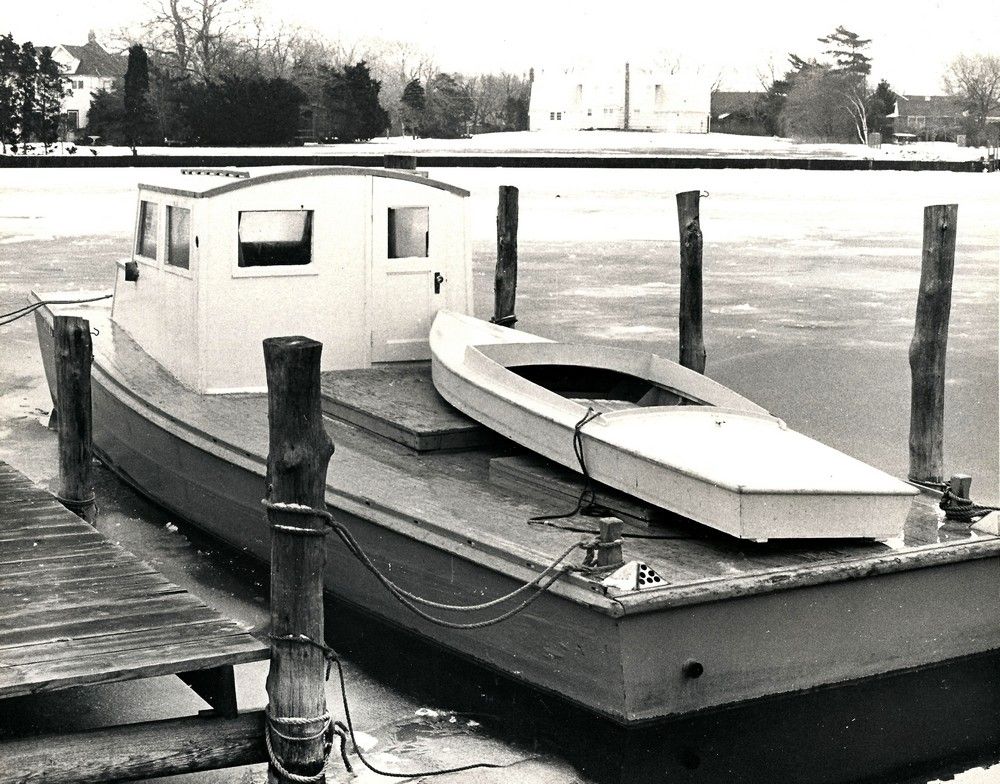
The mother ship idea was inspired by many earlier vessels on Great South Bay - like the Broadbill - built by Brud Skidmore, owner of East Islip Lumber - in the early '60s.
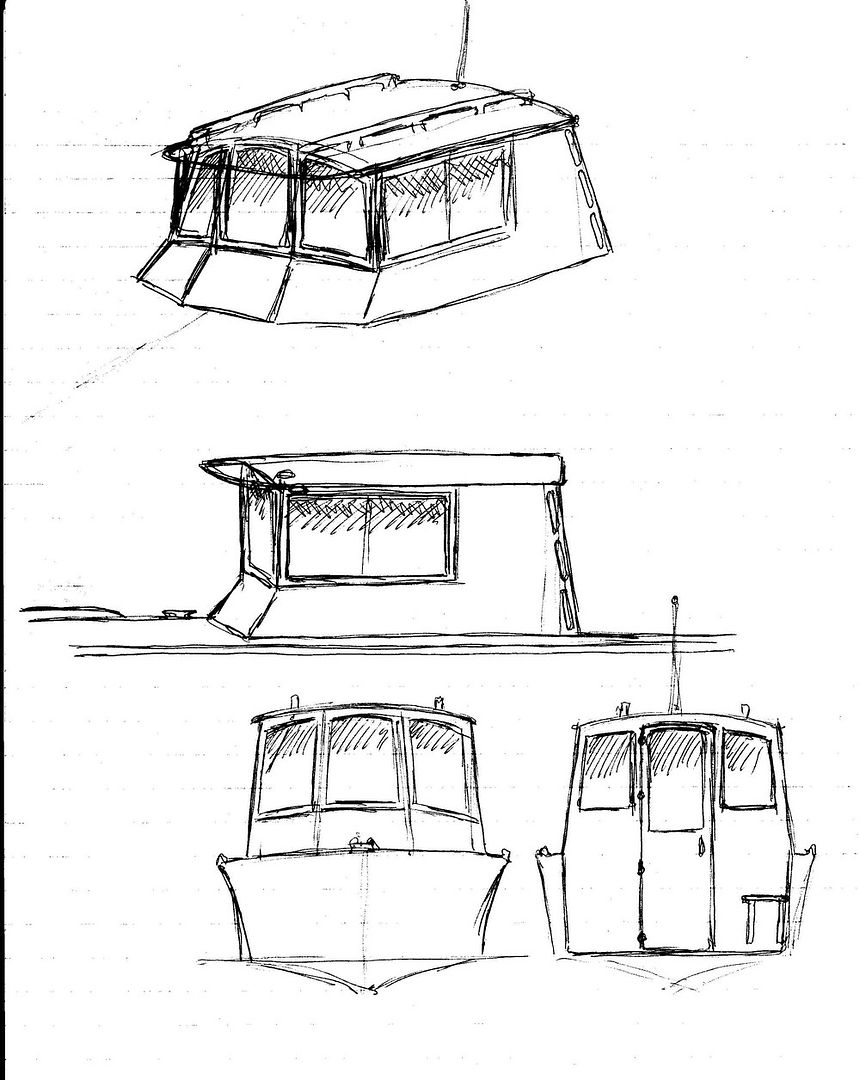
I drew this sketch based on the photos - never having really inspected the boat - which is ~250 miles from Pencil Brook Boatworks.
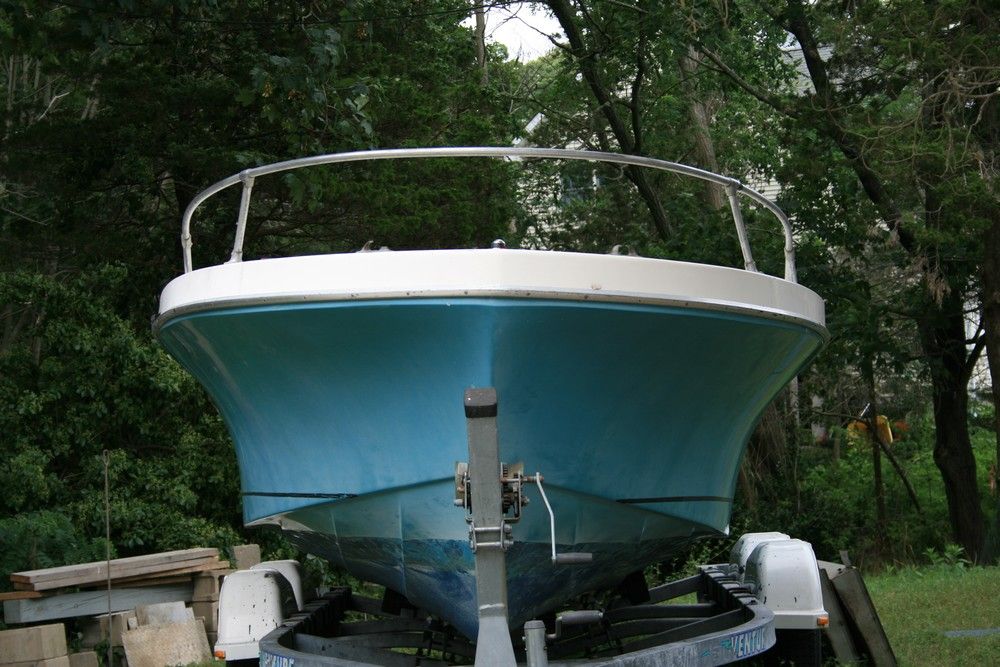
A closer inspection was conducted a few weeks later.
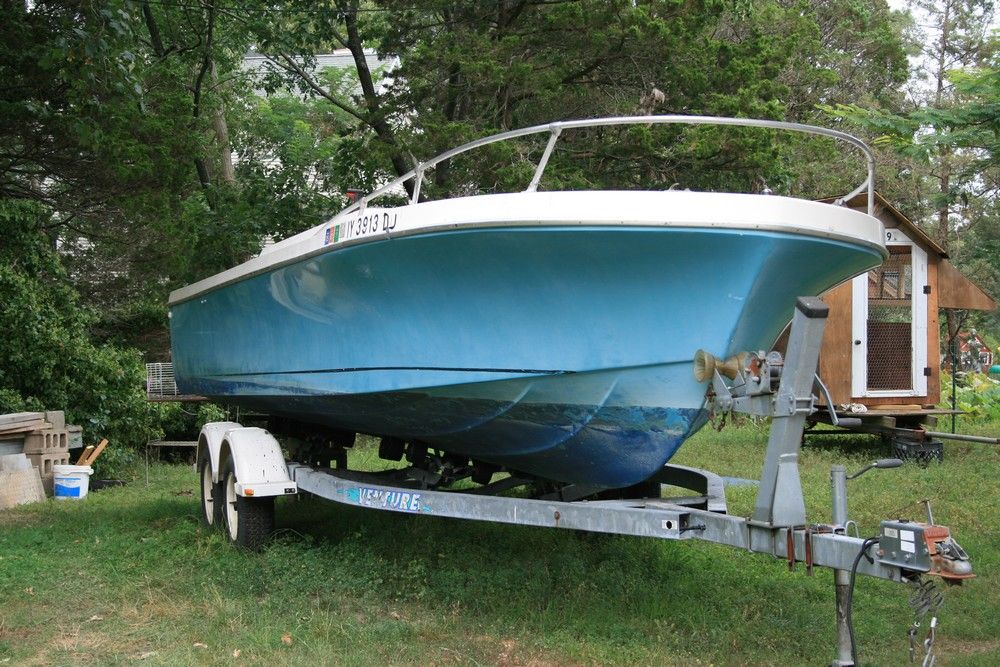
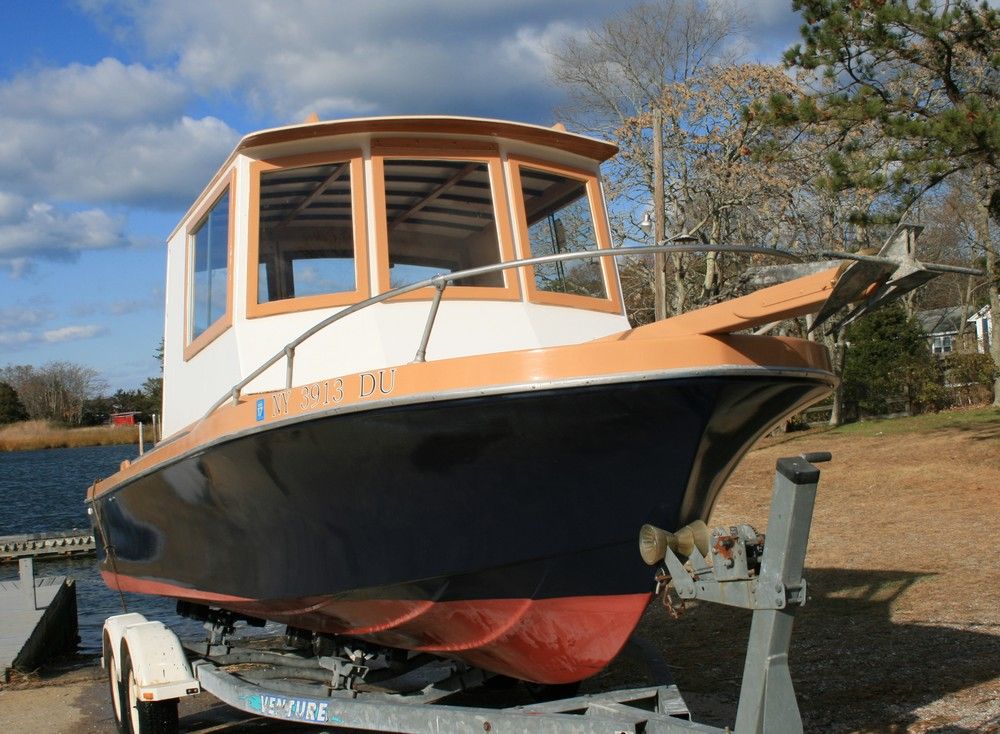
She has a beamy hull with some modest deadrise up forward - and draws about a foot - a handy feature in the thin waters of Great South Bay.
The objective of my first visit was to gather some critical measurements so I could make some measured drawings AND - most important - devise a way to build a 'house in my shop that would fit on a distant boat. Here we are making a full-size "plan view" template.
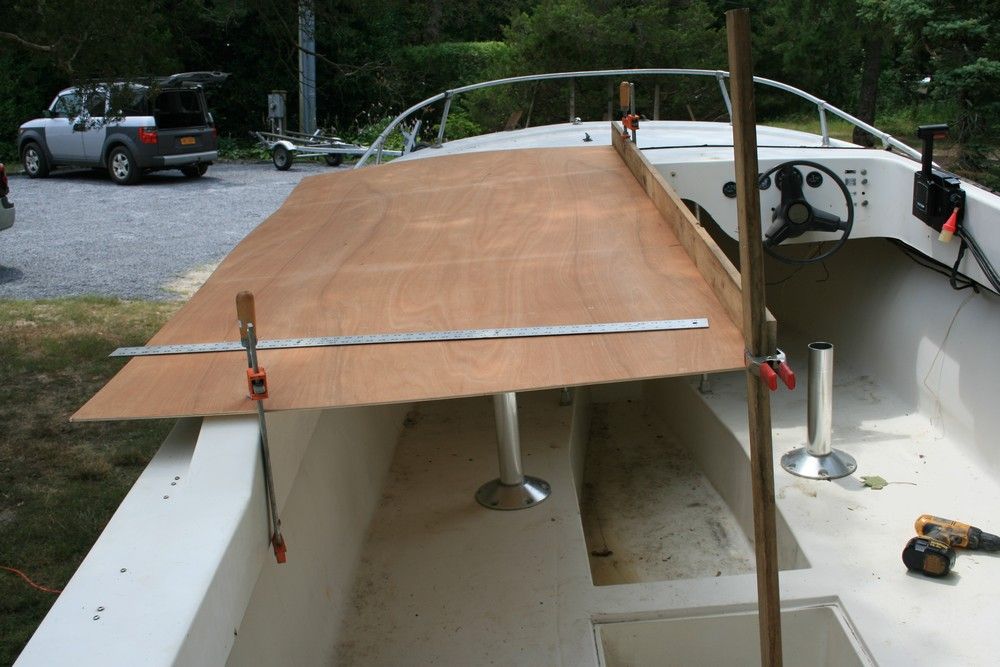
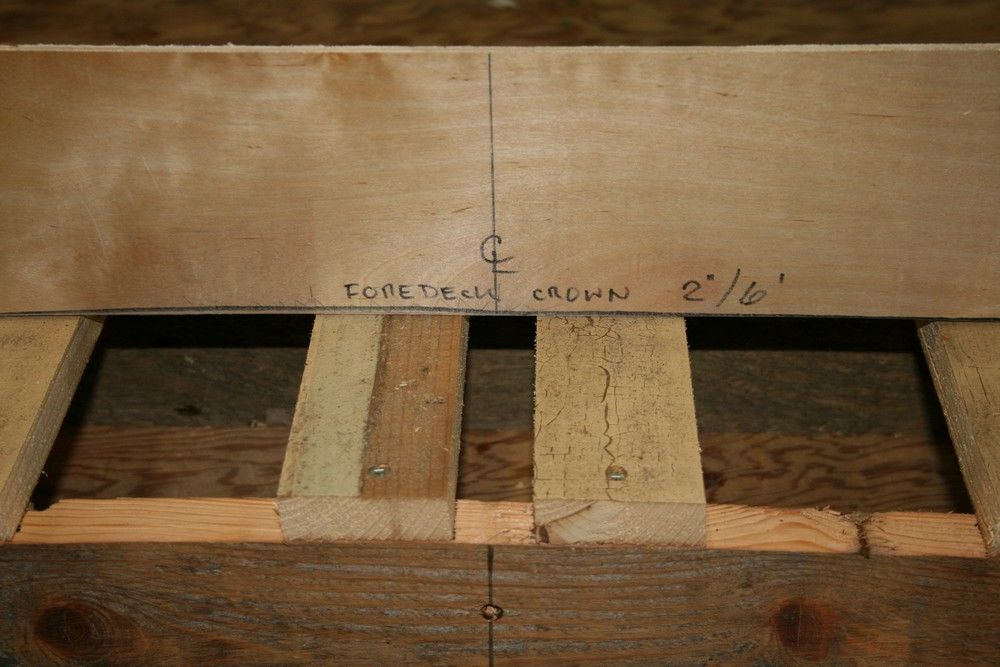
The forward end of the cockpit has about 2 inches of crown in about 6 feet of width. We made a full-size template. Luckily, the sides of the cockpit were straight and flat - greatly simplifying the job.
Since the original windshield and the raised coaming area are 3-sided, I revised my sketch.
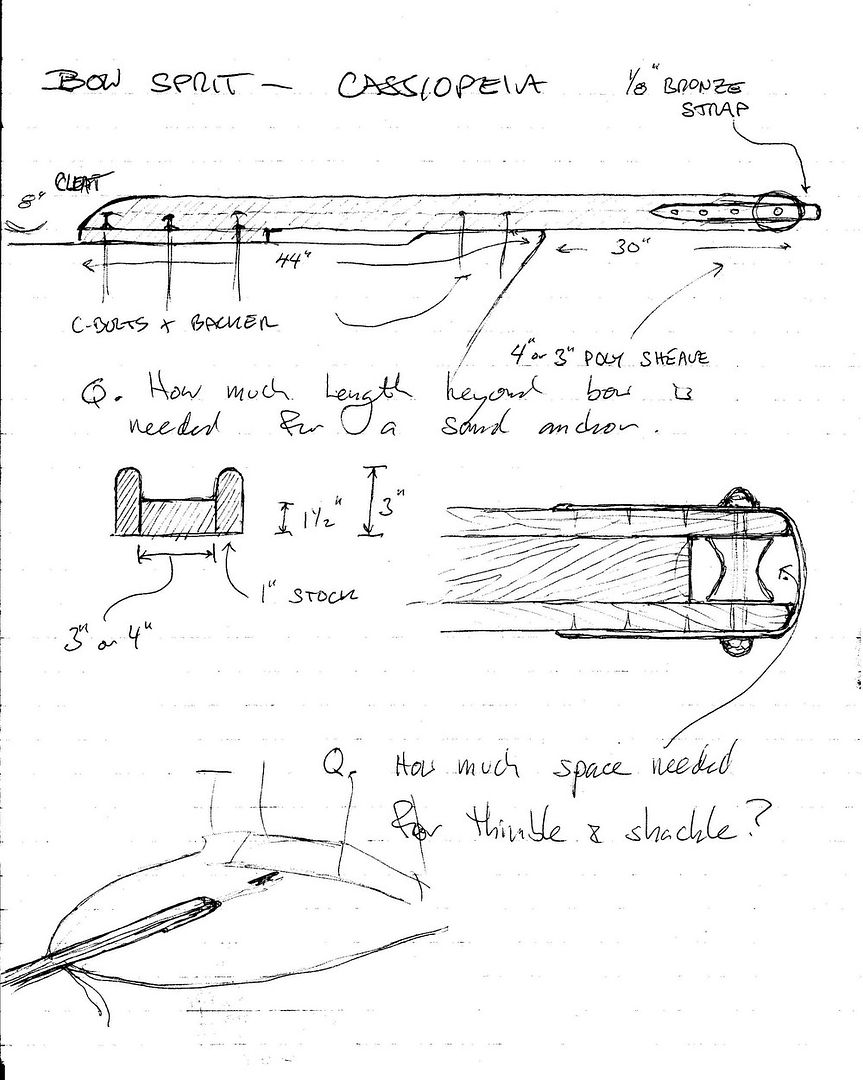
We consulted several veteran baymen - and planned a bowsprit.
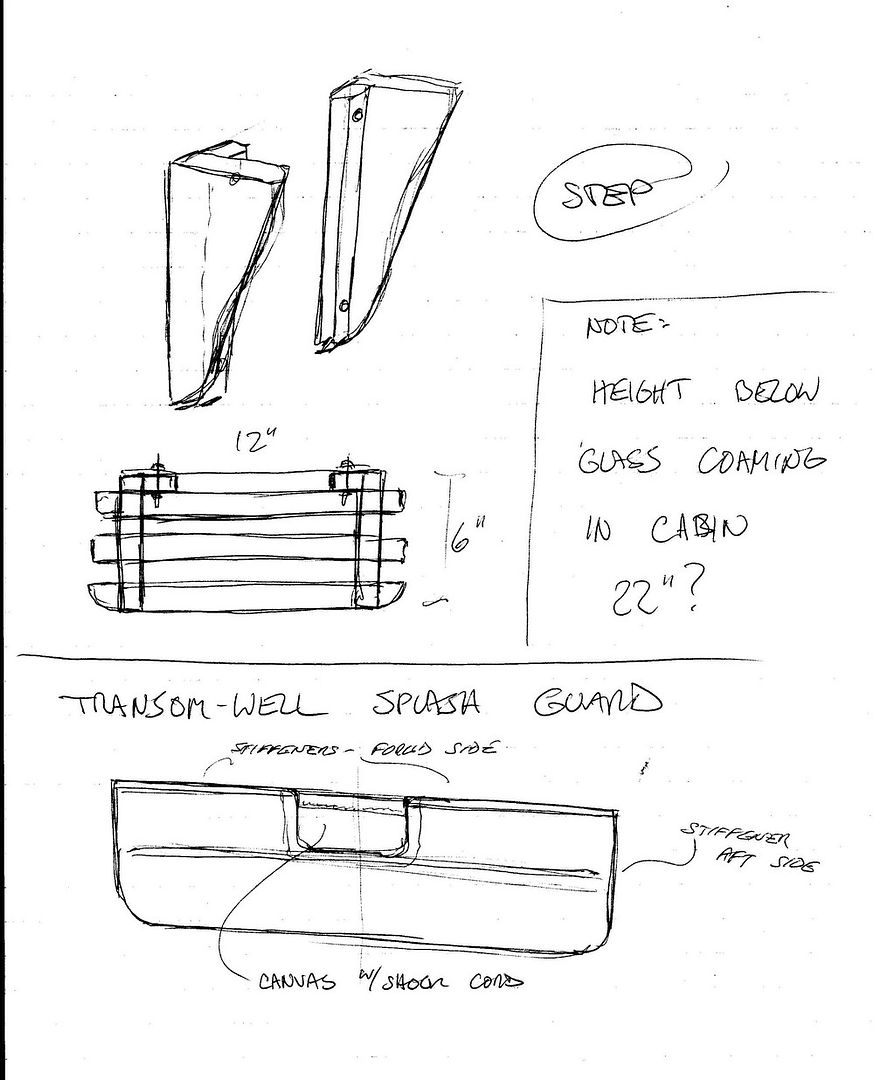
And, little features like a step on the back wall of the 'house will help when getting up onto the deck to go forward.
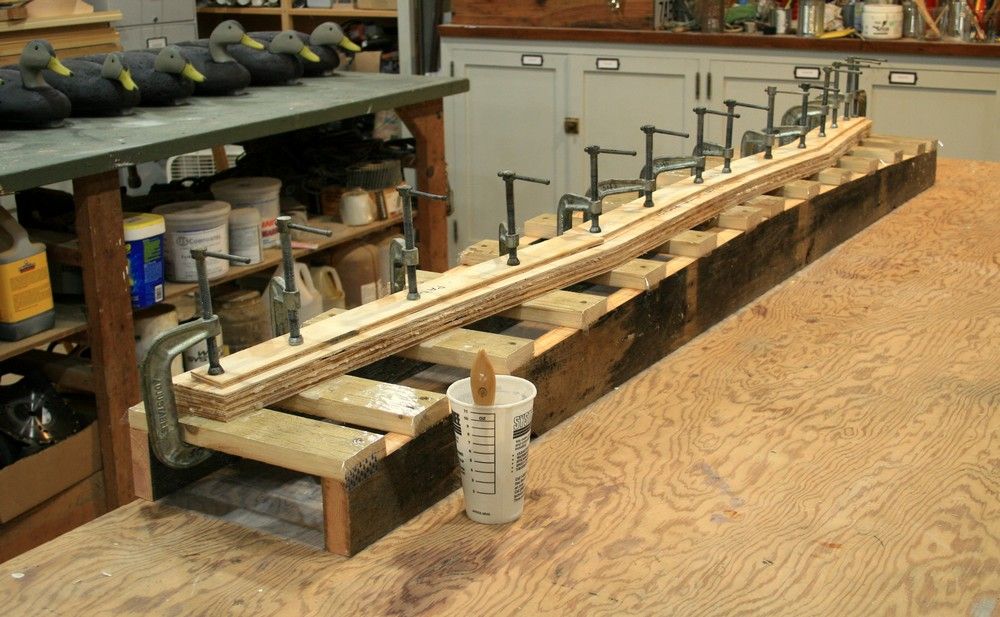
The first job back at the shop was to laminate a forward "sole plate" by which the 'house - along with the port and starboard sole plates - would eventually be bolted to the boat. I made up a jig and epoxied 4 layers of 1/4" AC fir plywood.
I stapled plastic - an old shower curtain - beneath the jig to catch the inevitable drips.
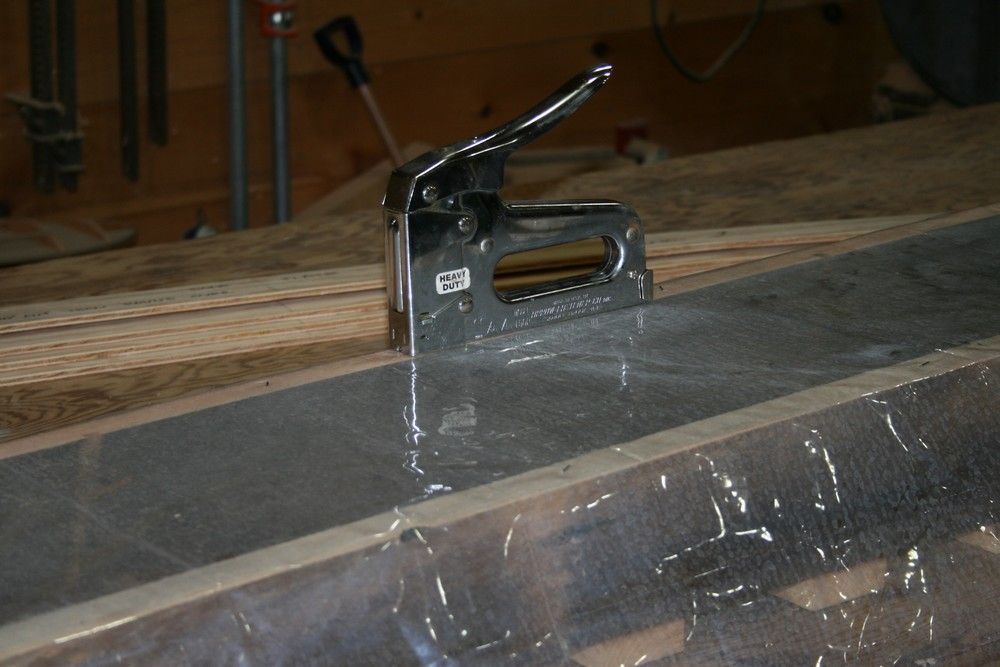
Wrapping each cross-member in cellophane tape worked well the first time - but was replaced with the plastic after the second glue-up.

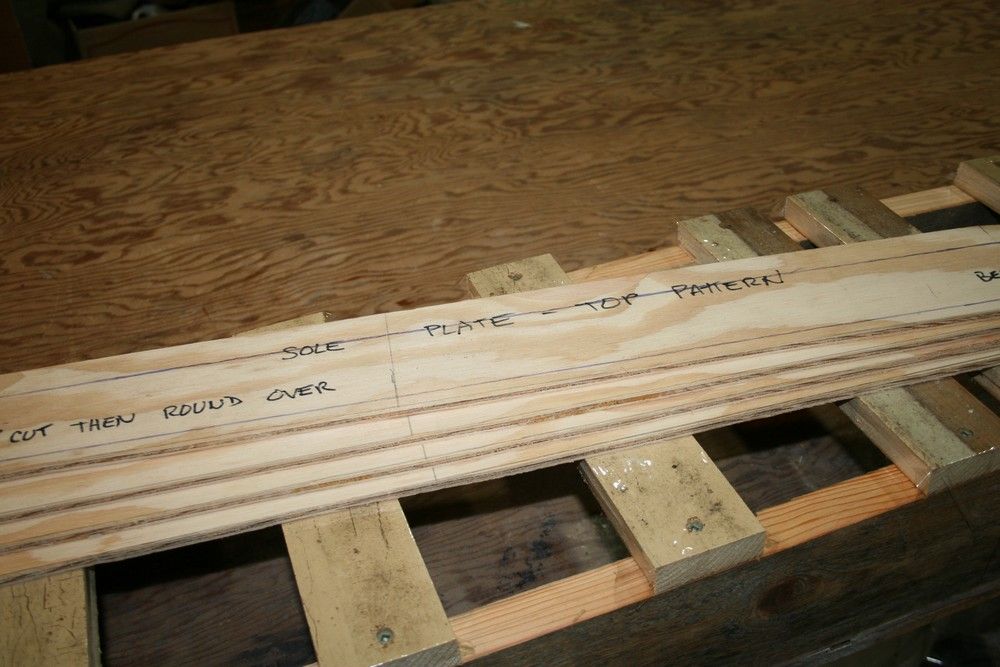
I made each laminate oversize so I could trim it to its final dimensions.
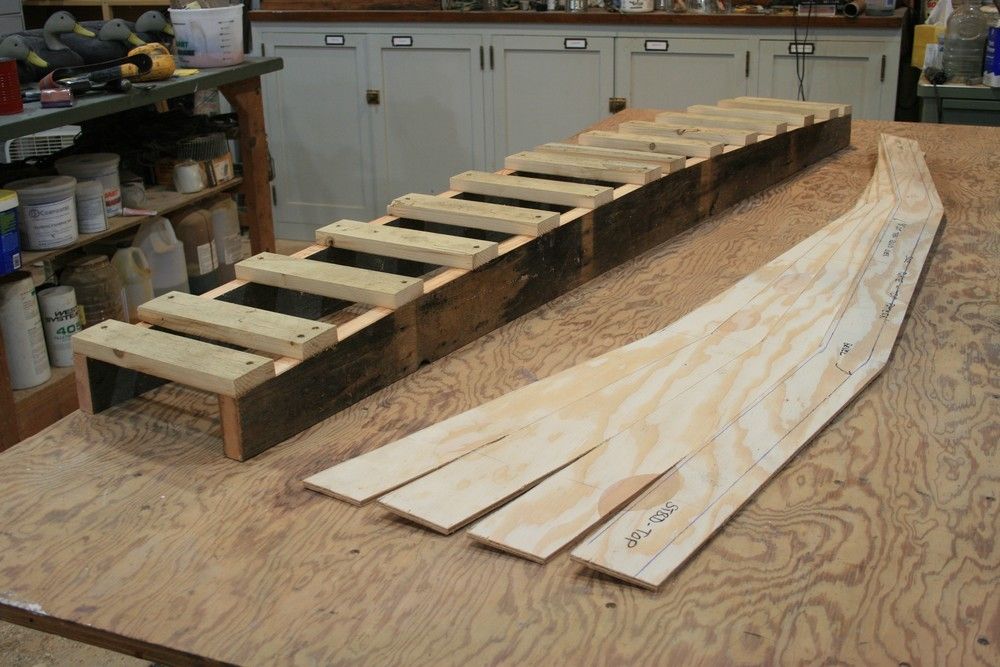
Notes are always critical to keeping the orientation of every piece as planned.
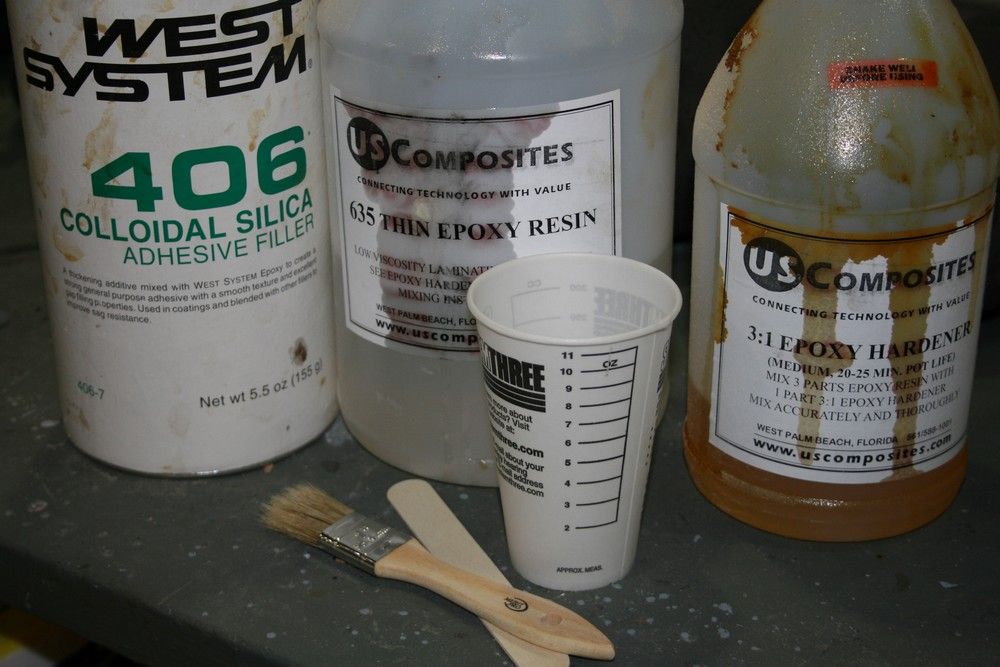
I use measuring cups instead of pumps - although I have a brand-new set of pumps in the cabinet....
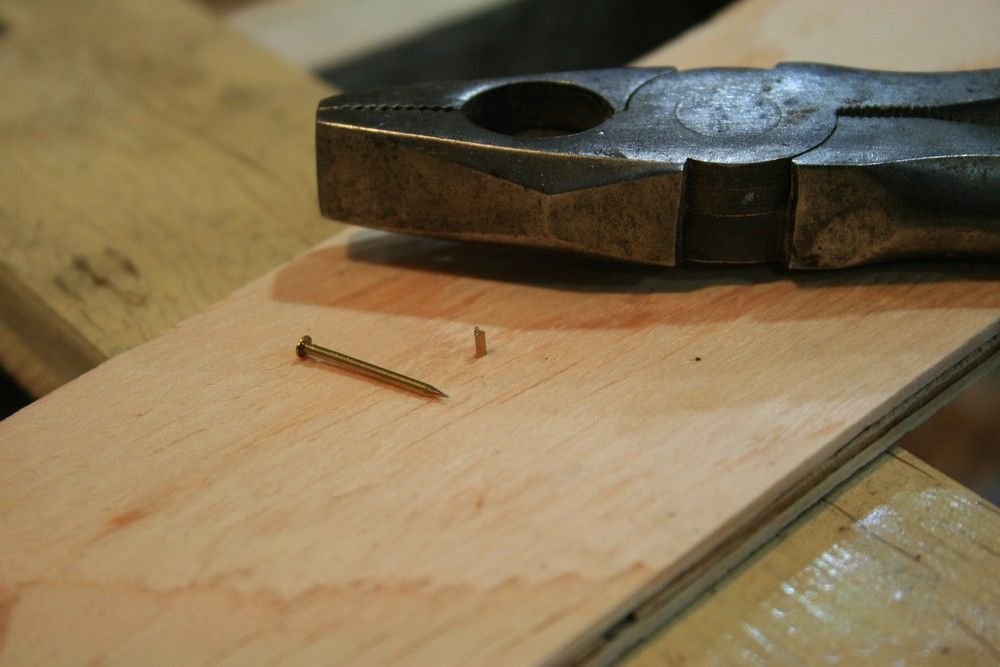
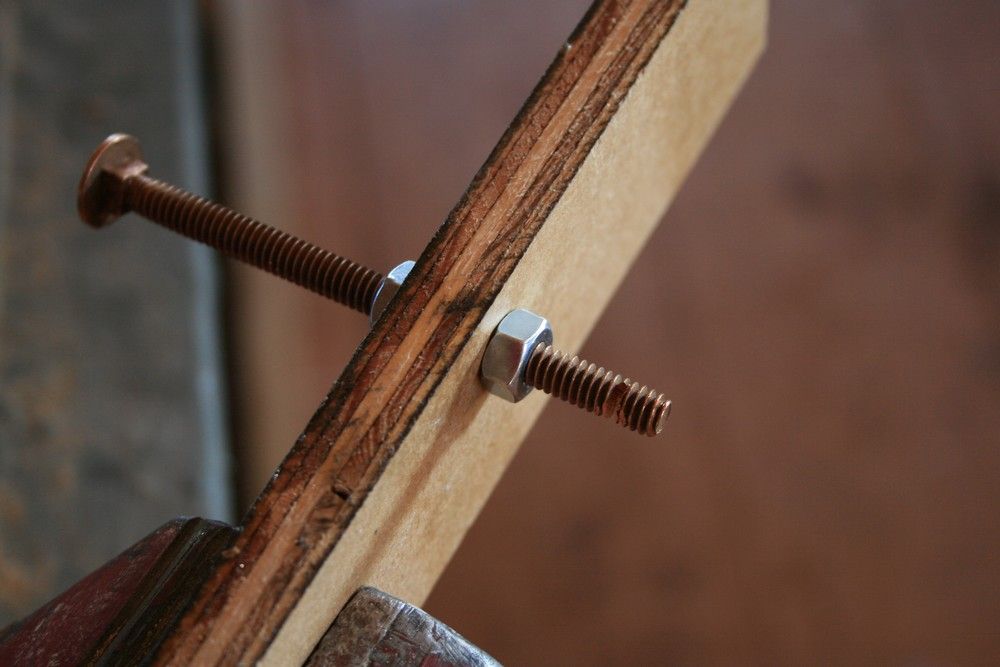
As I do with my hollow decoys, I use snipped-off brass escutcheon pins to keep the layers from sliding around while clamping.
Here's that OCD - notice all the clamp handles headed south????
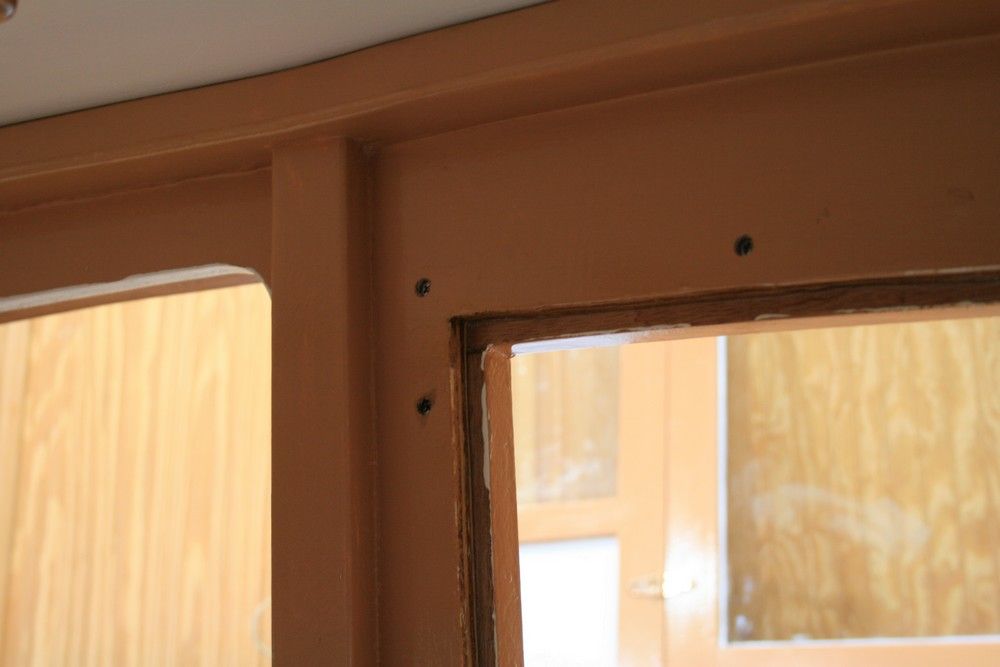
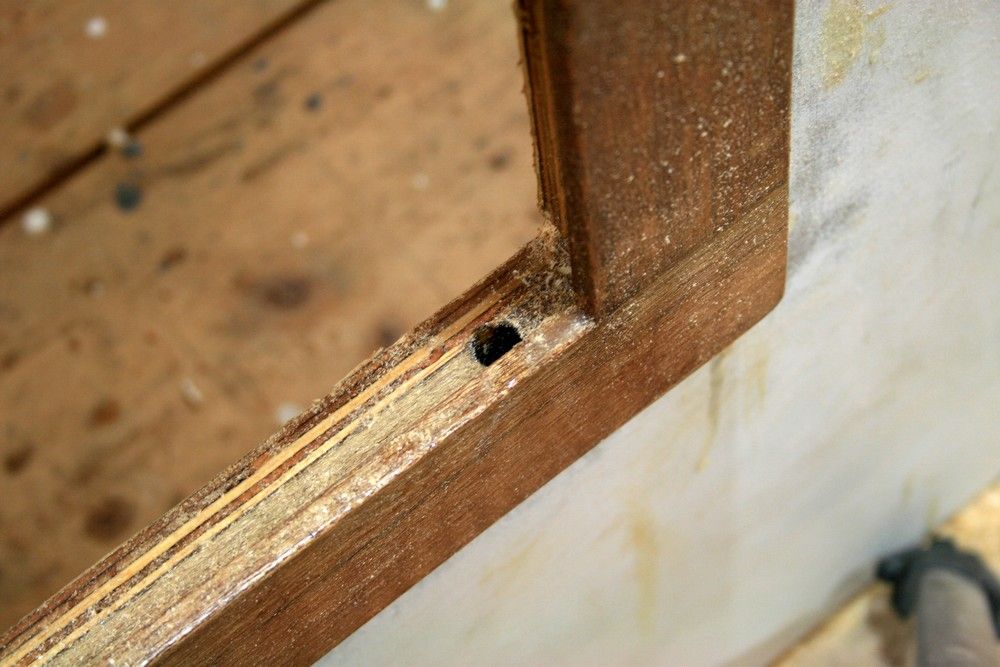
Back at the boat a month later, we first removed the windshield. I do not have a good photo - but you'll have to trust me that the forward sole plate fit perfectly.
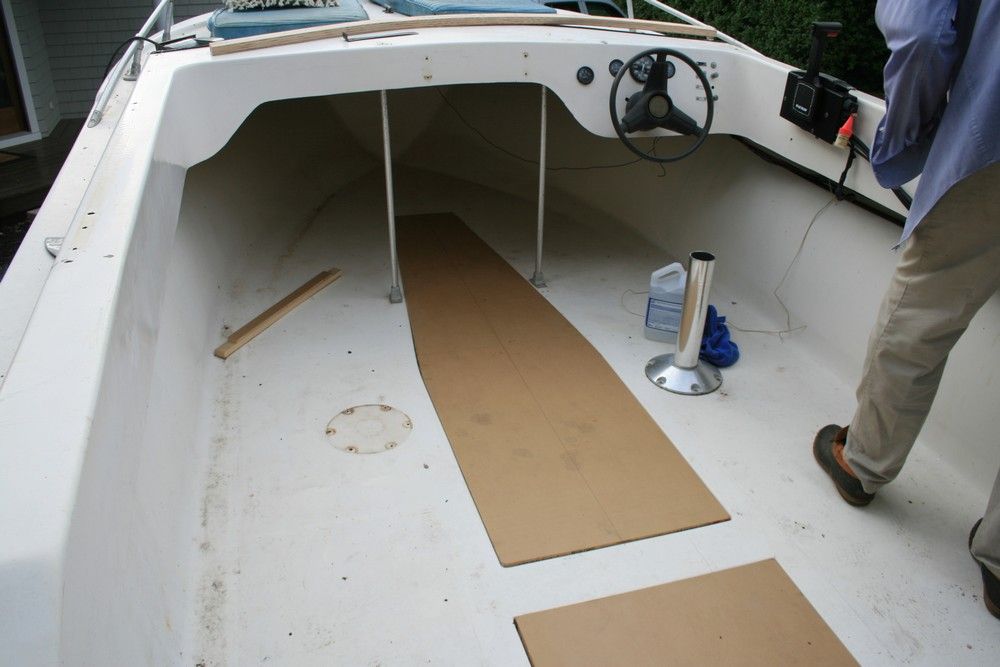
The next job was to cover the wells in the cockpit so we did not fall while concentrating on other tasks. We screwed cleats into the forward well to support a floorboard - but the aft well already had a molded lip.

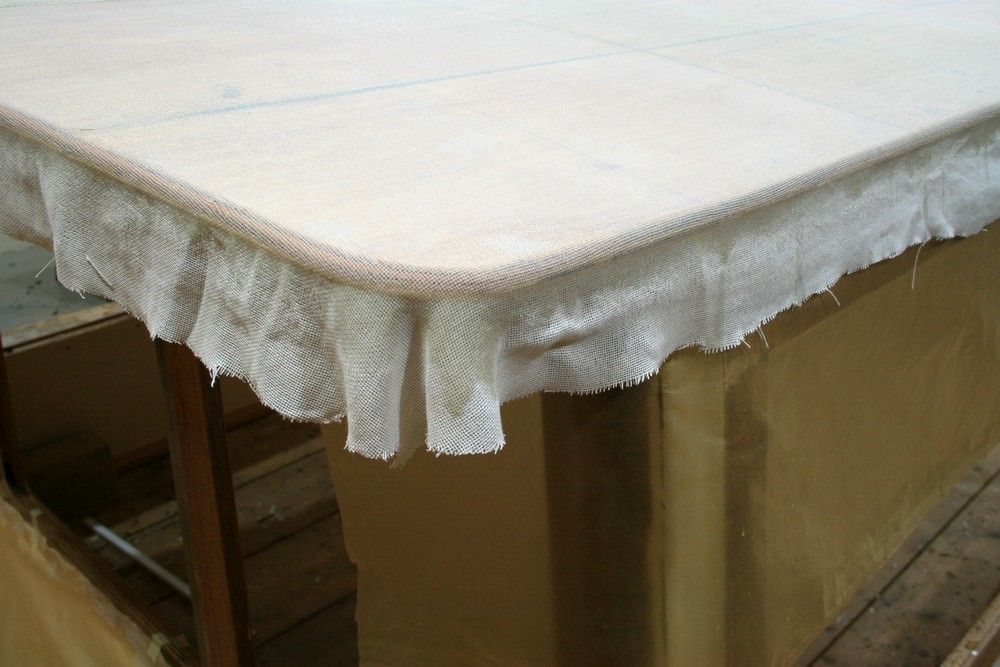
We are using MDO - medium density overlay AKA sign board - extensively in this project. The forward floorboard is 1/2 inch, the after is 3/4. Both will get 'glassed and sealed - and more cleats were screwed to the bottoms to stiffen them laterally. We painted them with non-skid deck paint (Interlux Interdeck). (BTW: You can see the forward sole plate in this photo but it is not in place.)
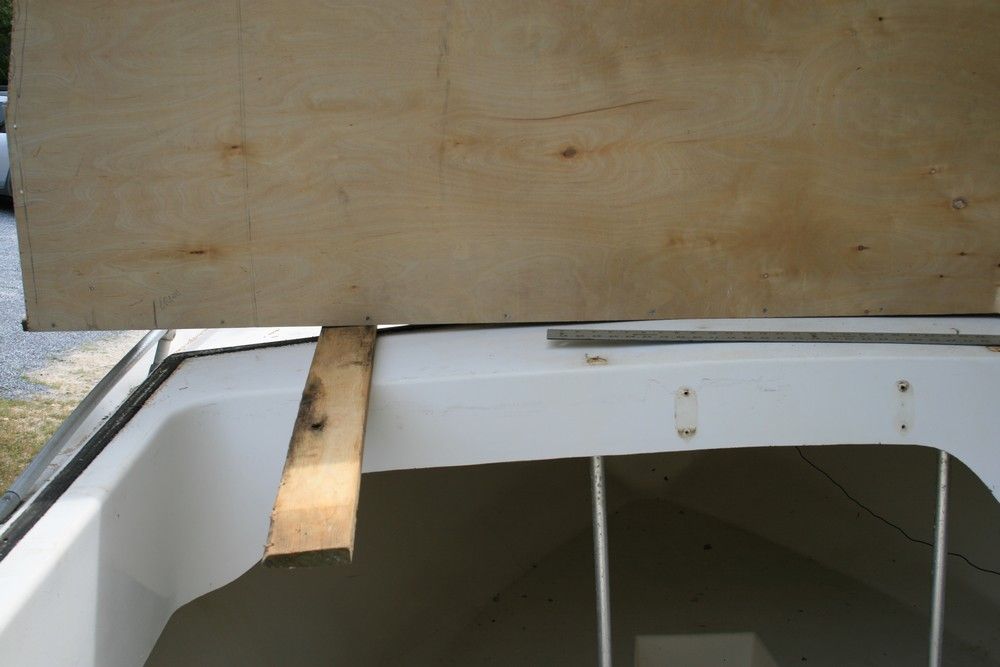
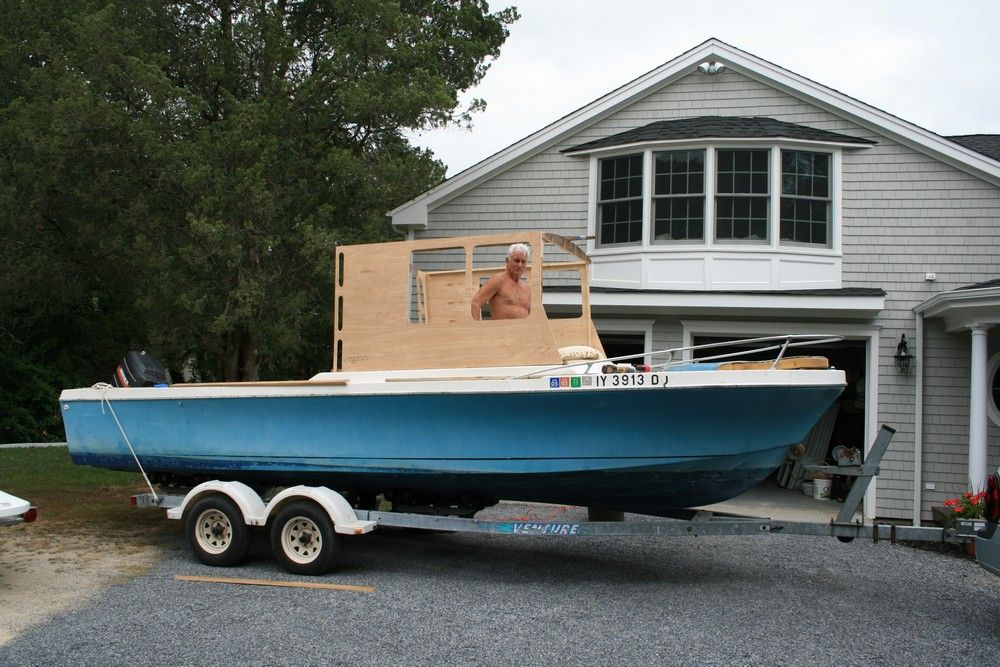
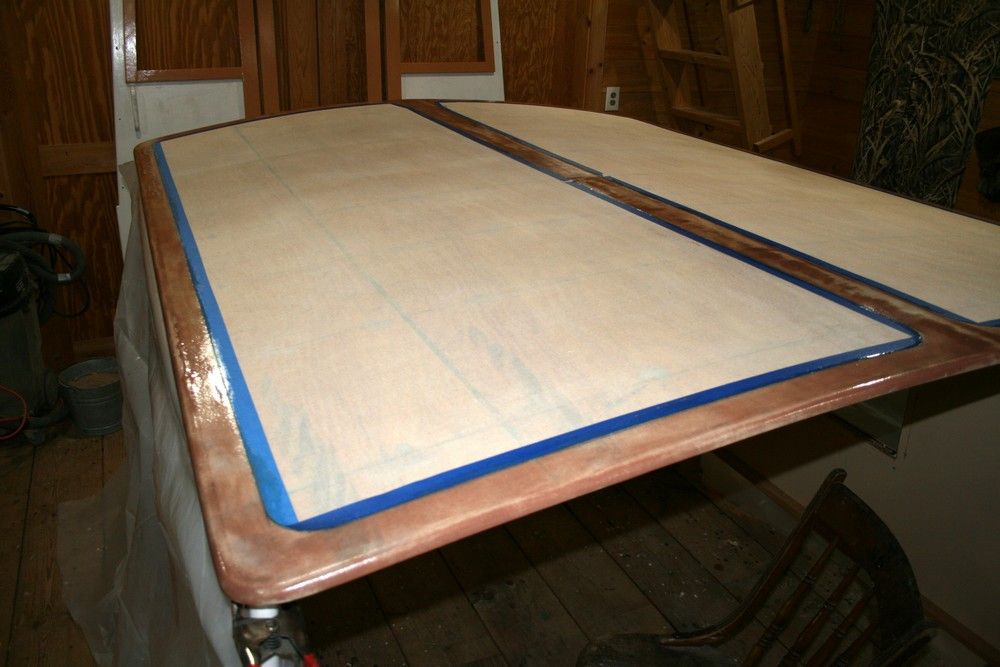
We bolted the sole plates in place then screwed on full-size templates - of 1/4" lauan underlayment - to mock it up full size.
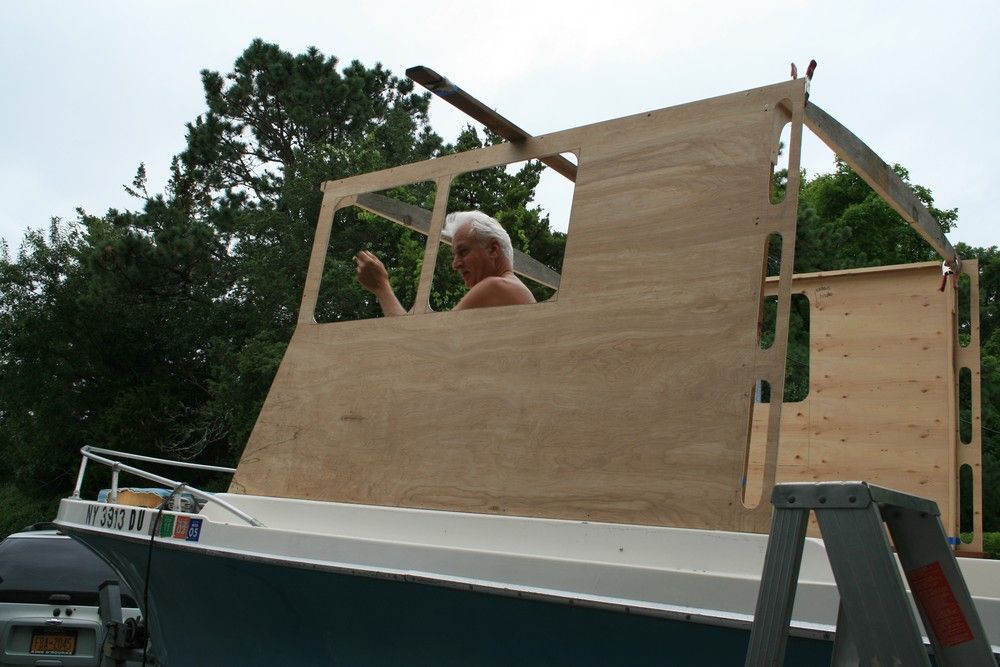
We made numerous alterations: Lower windows and lower height were the most important. This mock-up stage was VERY informative/valuable - would not have wanted to build without it.
Then, back north with a load of altered - and annotated - templates.
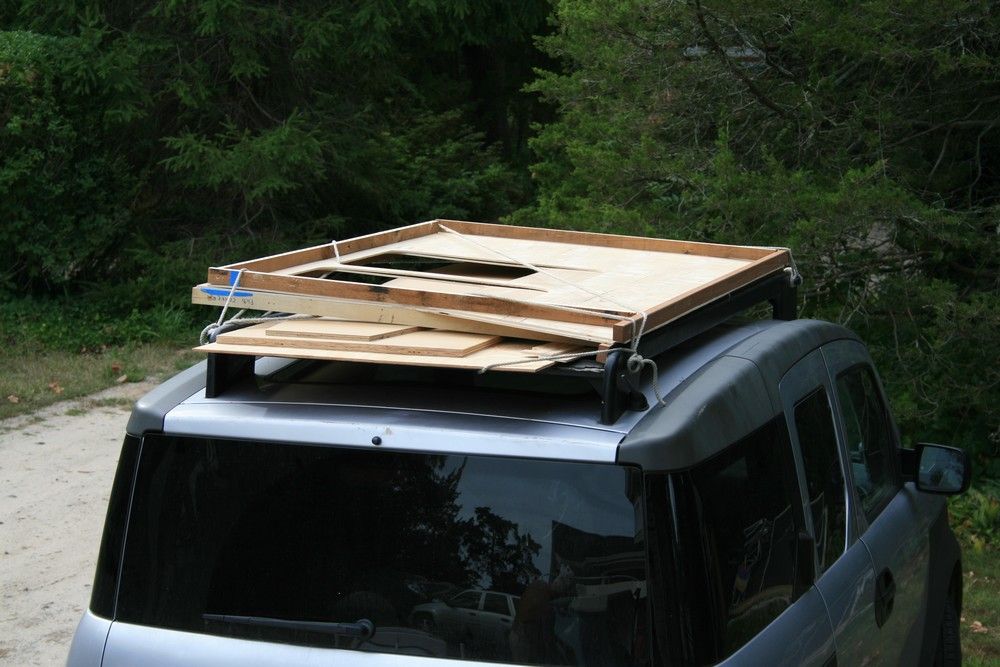
I brought the floorboards back for final trimming, adding the cleats and finishing.
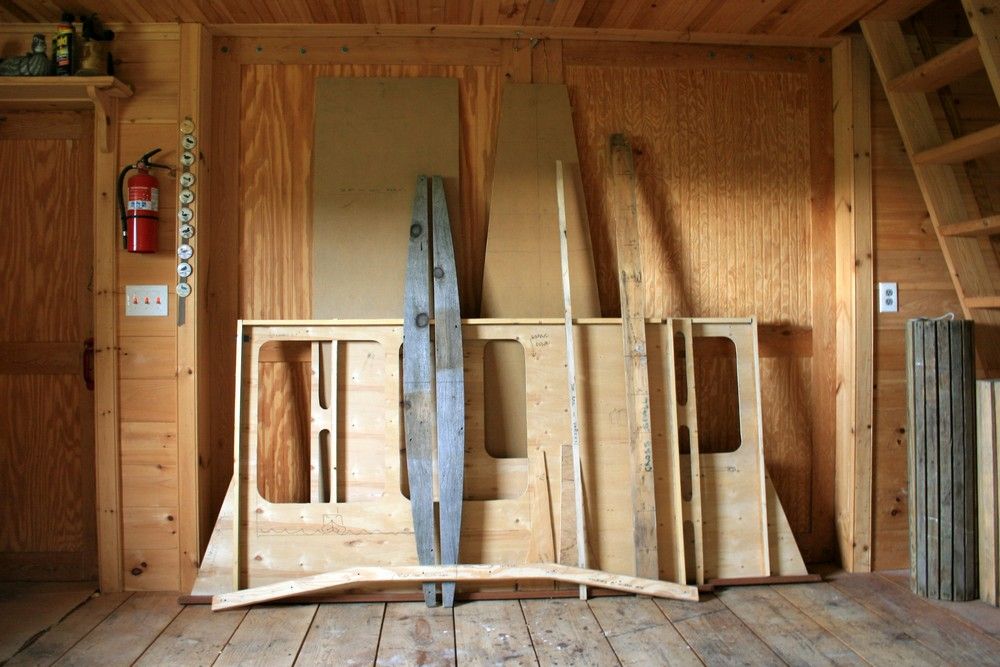
The notes and full-size measurements on the templates guided my construction of the actual 'house.
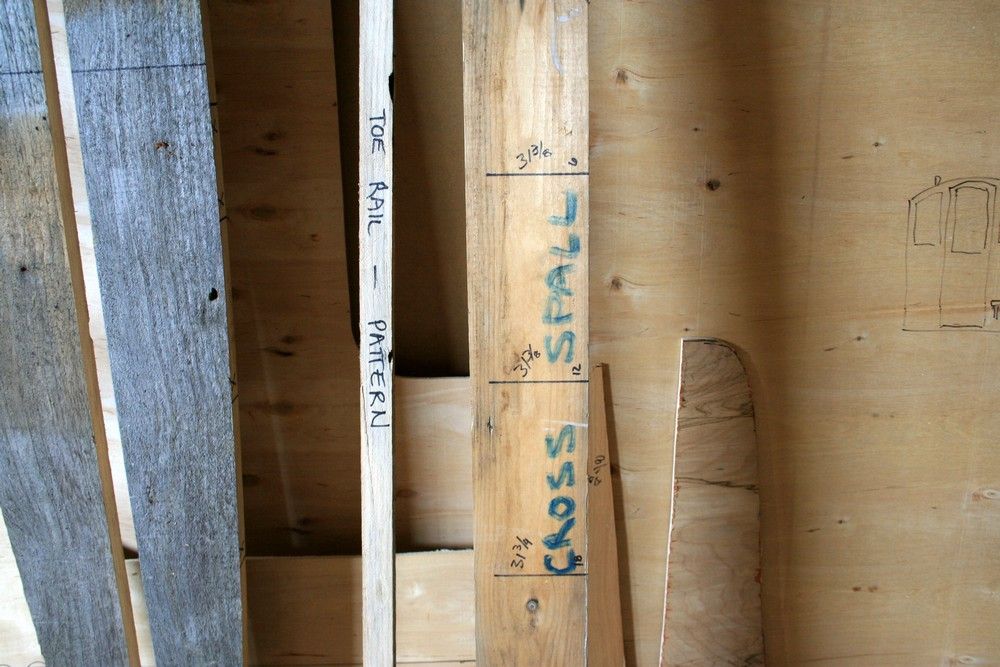
Lots of notes.

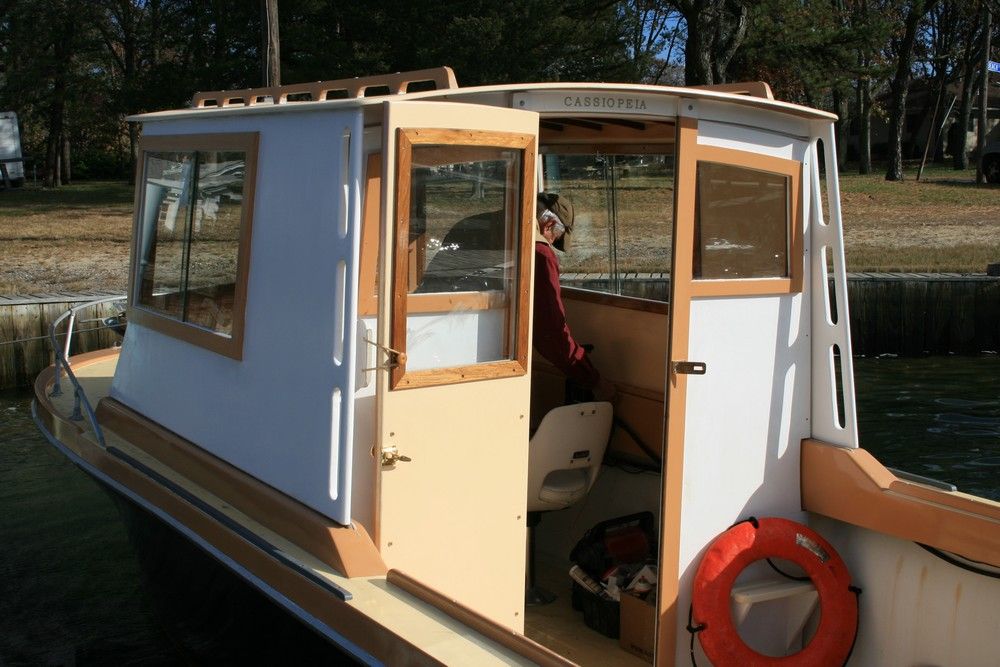
Out the starboard sliding window was Red Oster - steaming toward us - to chase us off "his" Great South Bay.....
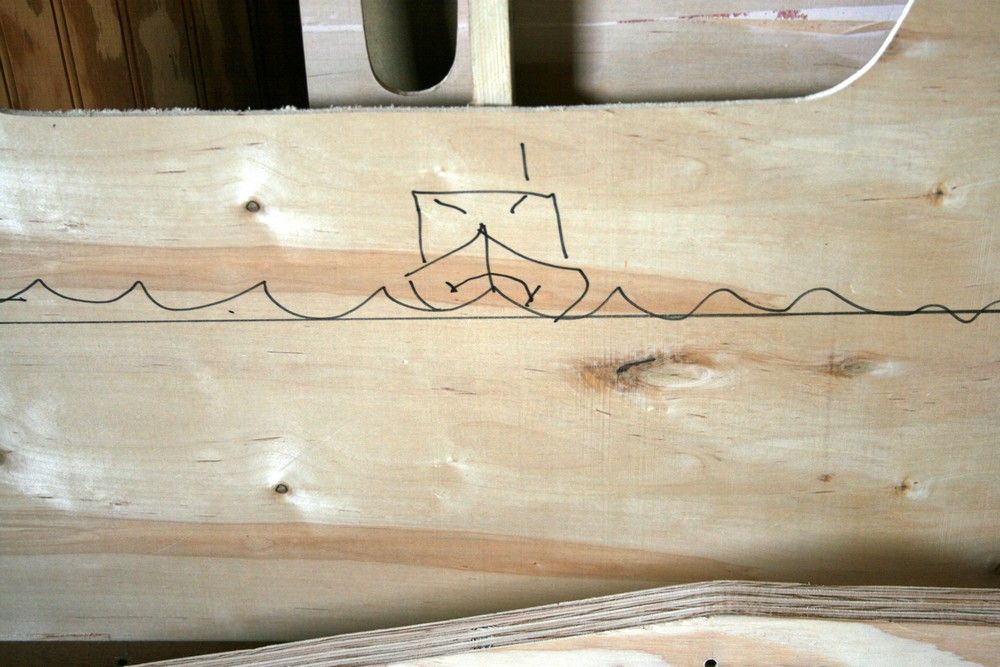
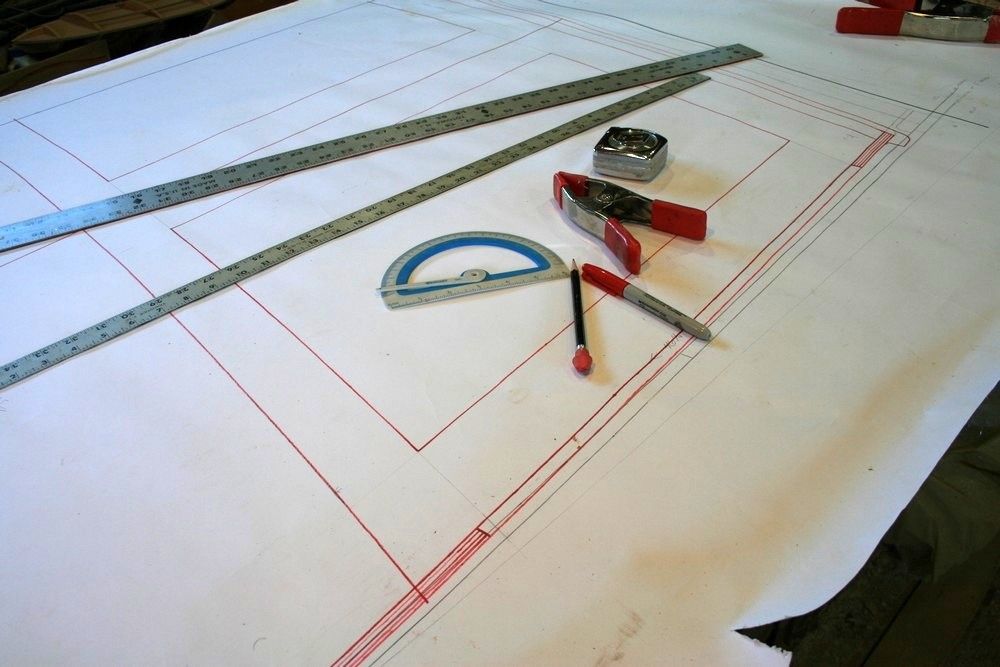
First step was to revise my full-size drawings by transferring all the new information. The new lines are in red.
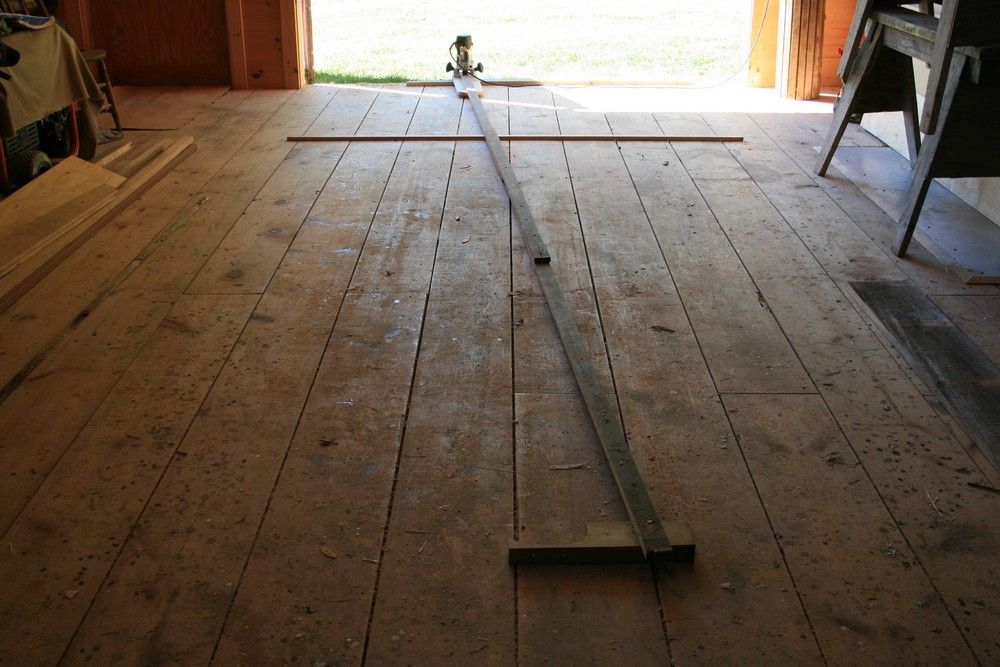
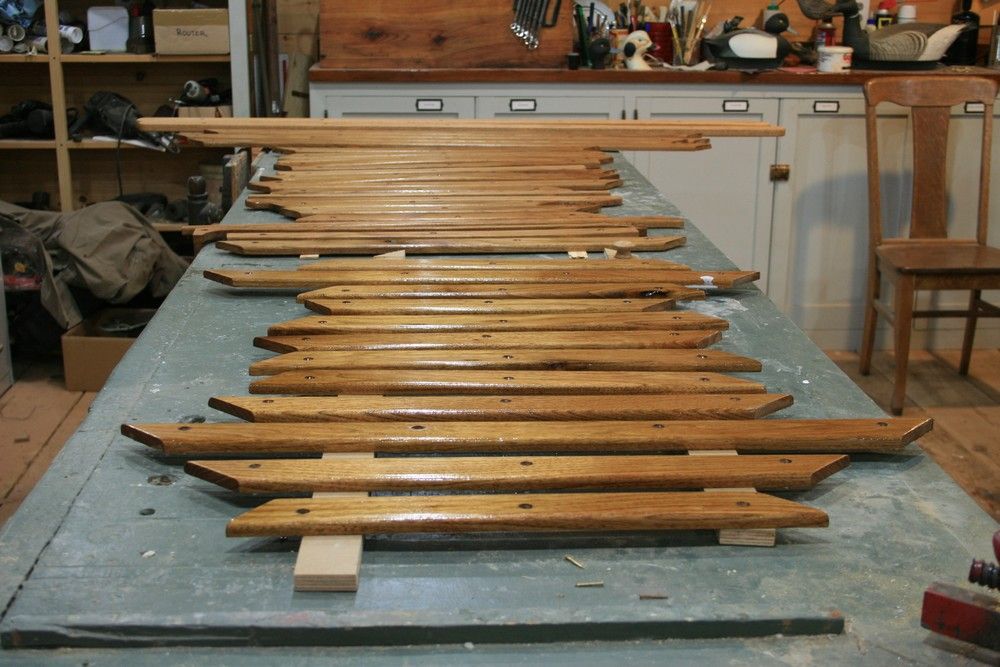
The other forward frames and the roof will have 3.5 inches of crown across ~ 6 feet. So, I made a beam compass with a 17.5 foot radius.
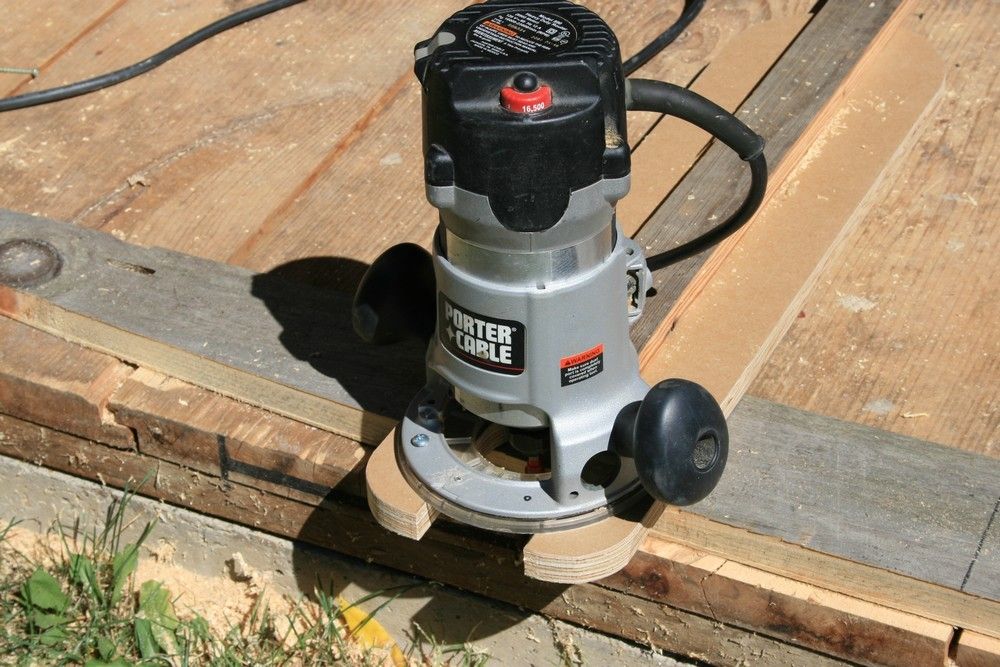
I cut the sides of the new jig with a straight bit in my bigger router.
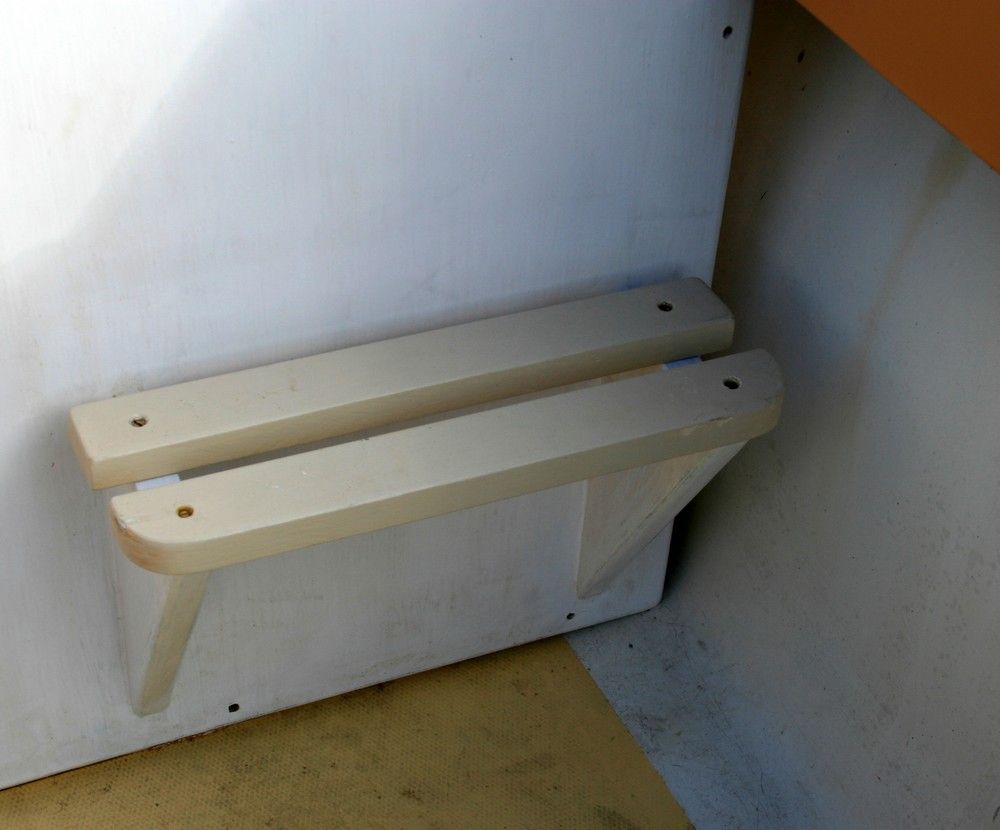
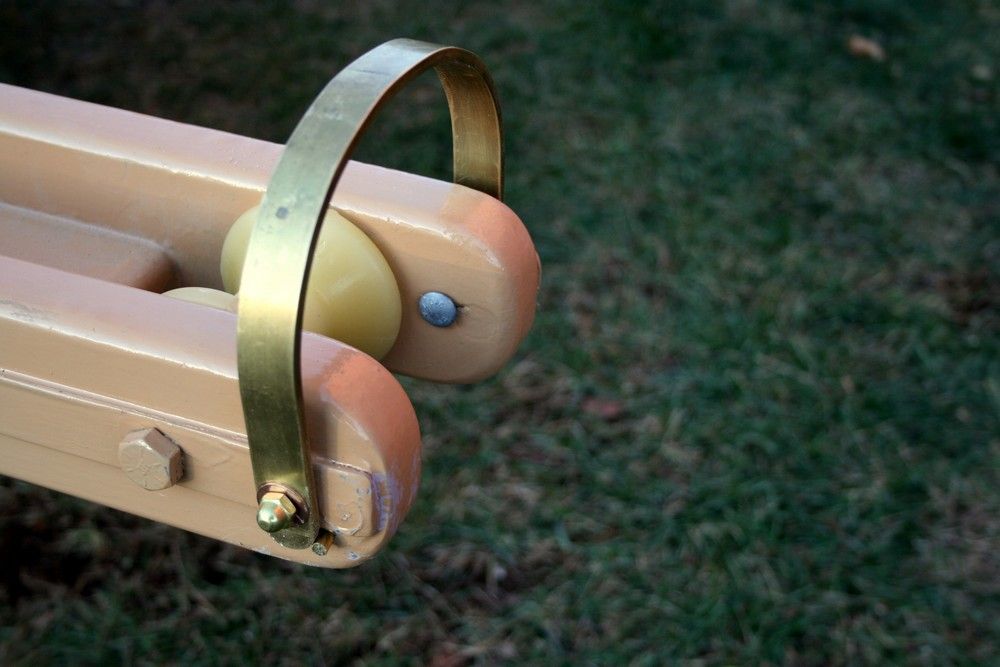
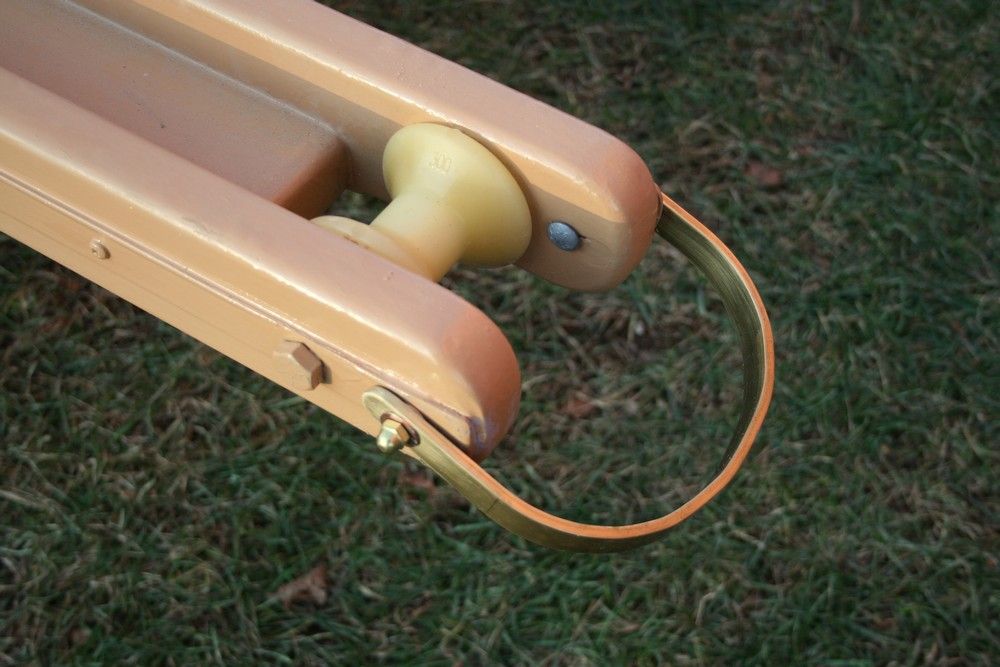
I also worked on the appurtenances - like the bowsprit and the storage bench. I sent these back to Long Island with Craig in early October. I will need to modify the bail on the forward end of the 'sprit to get the anchor up, out of the way, and snug when not in use.

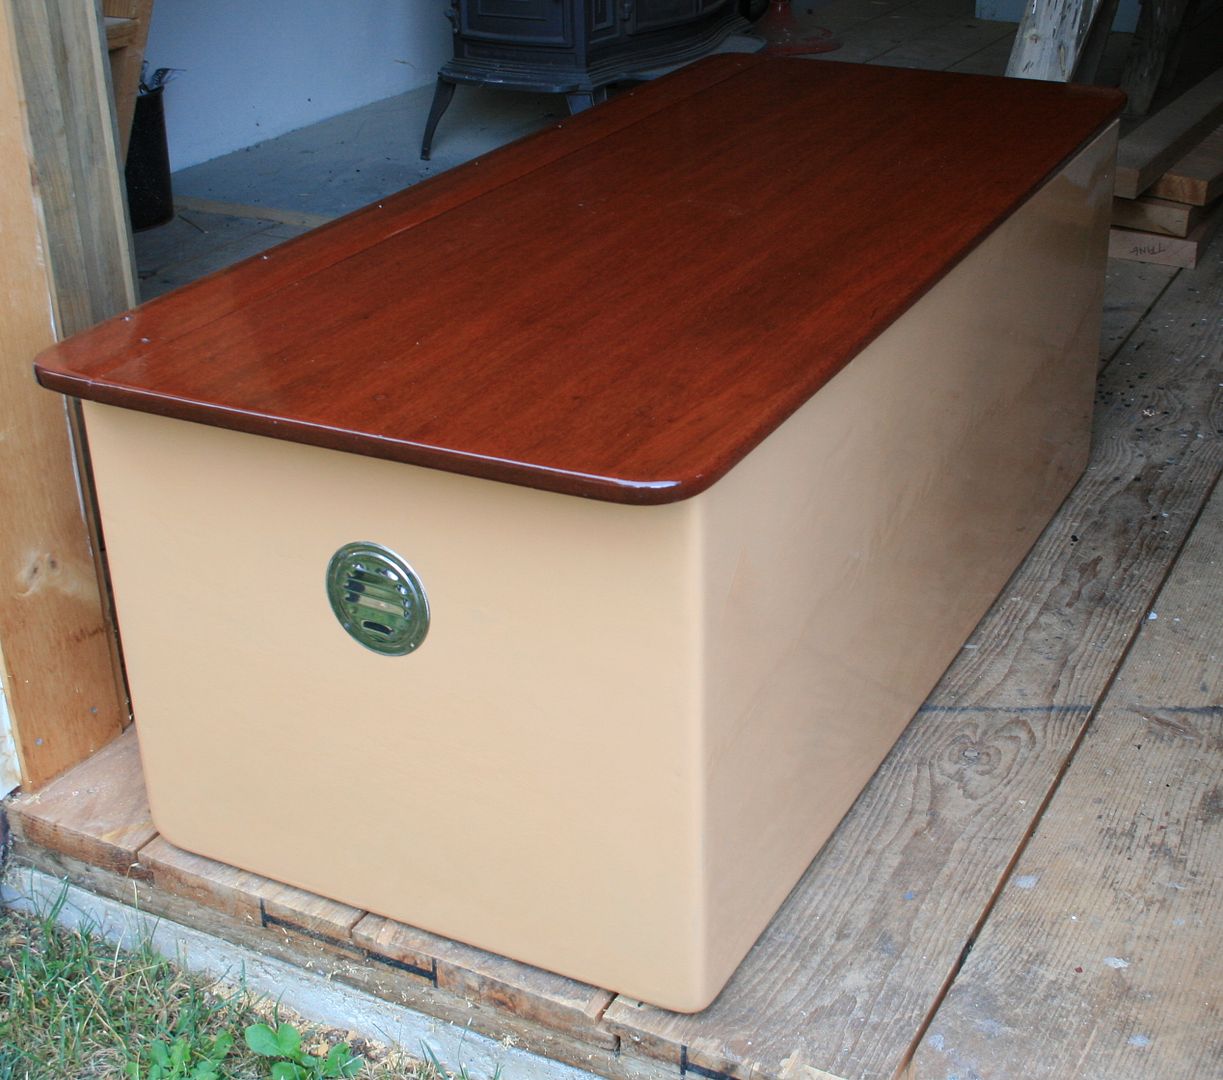
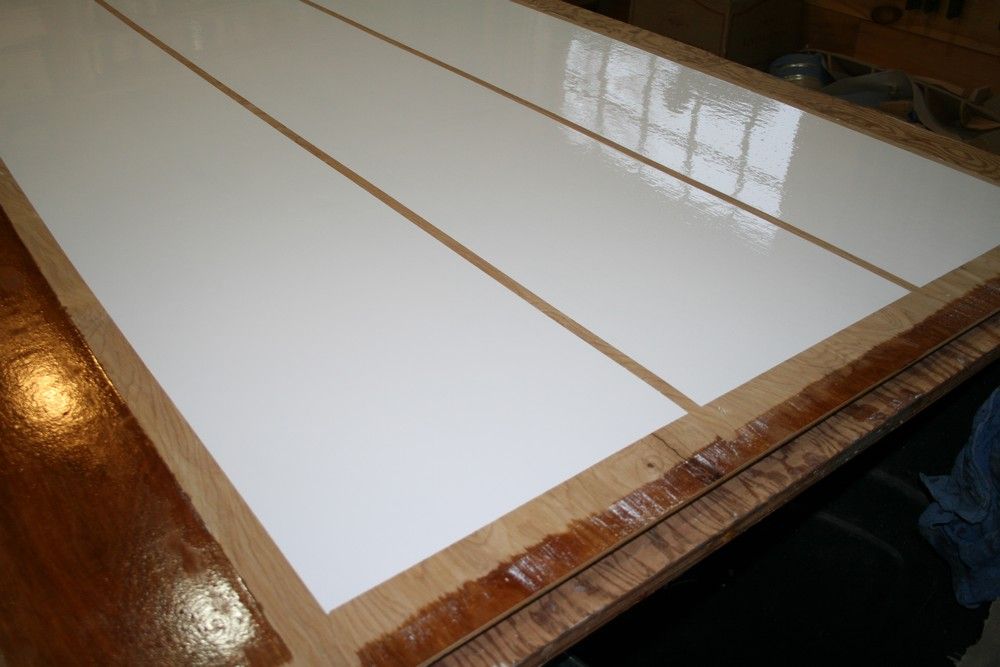
I re-purposed the tool box I had built for my '83 Ford Ranger - and made a new top from mahogany that used to be the stern sheets in a Daysailer. This storage bench will reside in the pilothouse - opposite the helm.
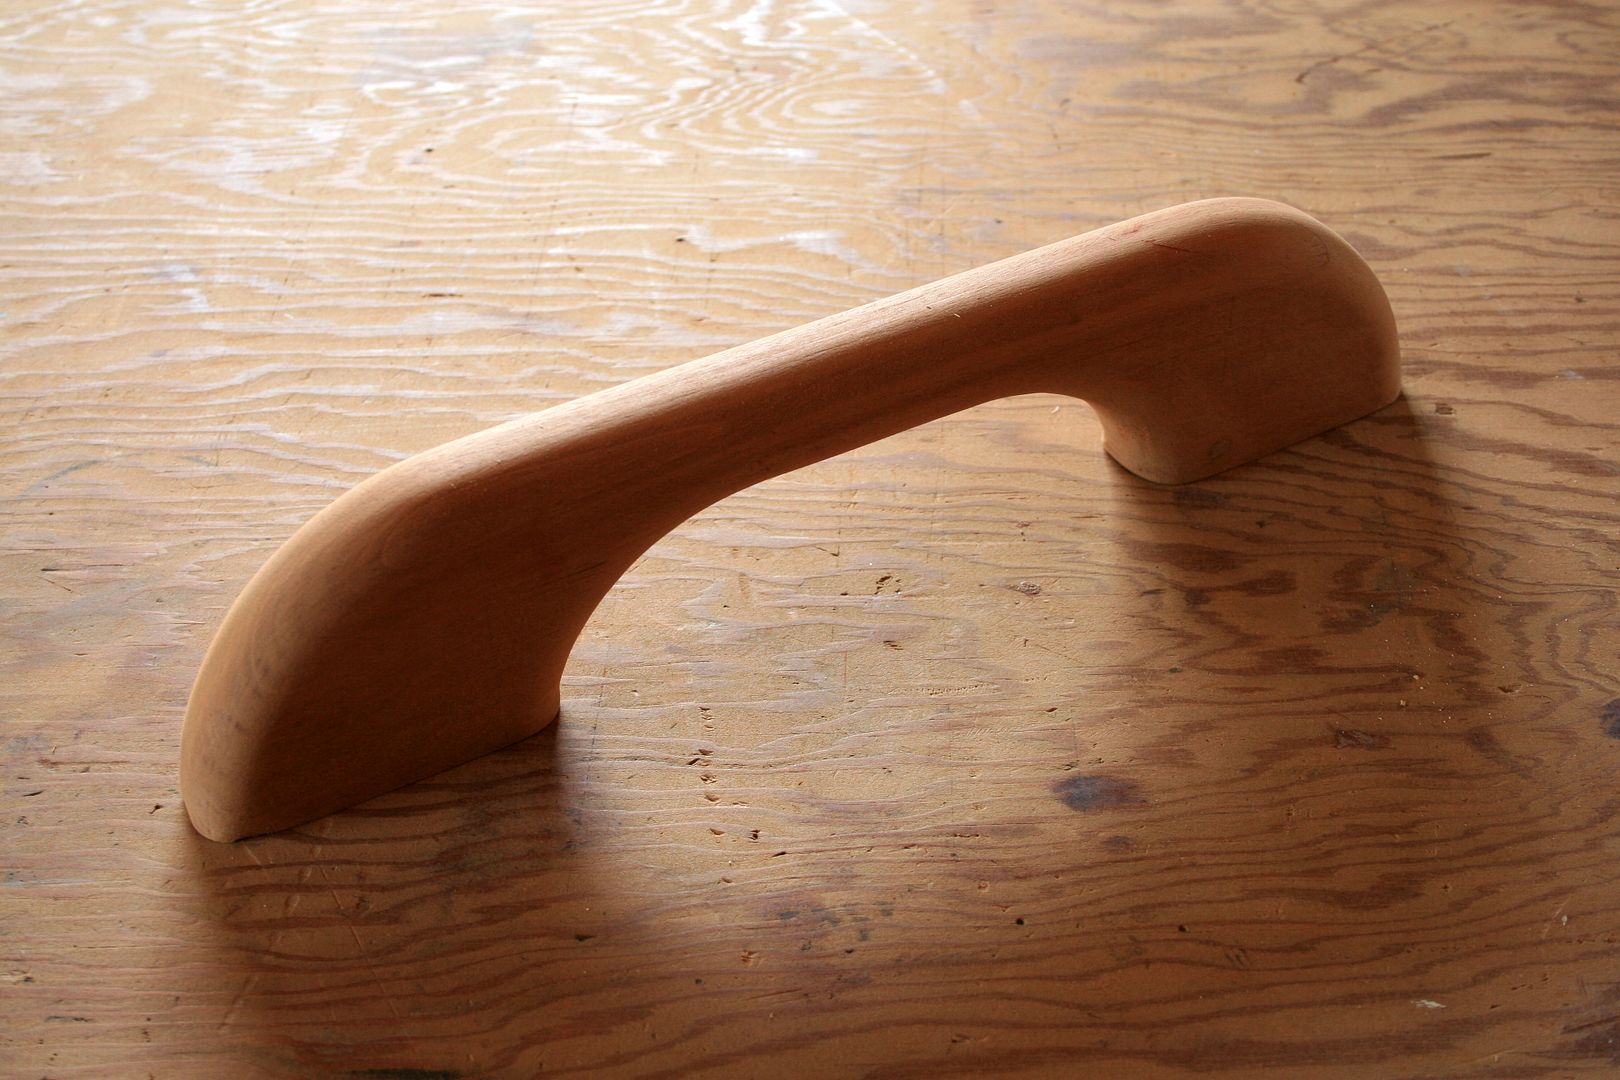
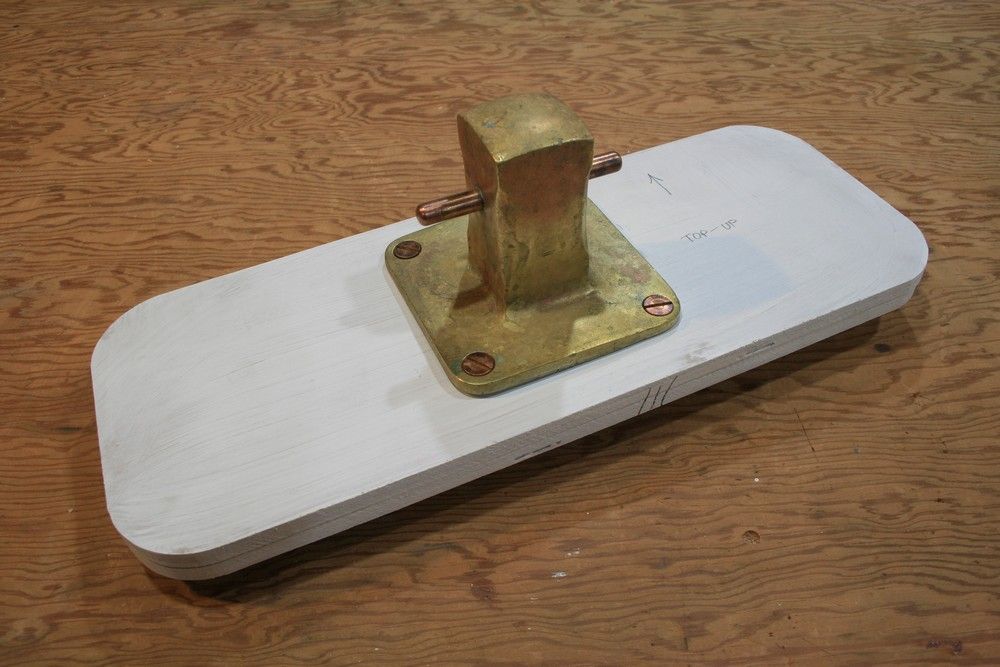
This grab handle will help the gunners getting in and out of White-Wing (our scooter/layout boat).
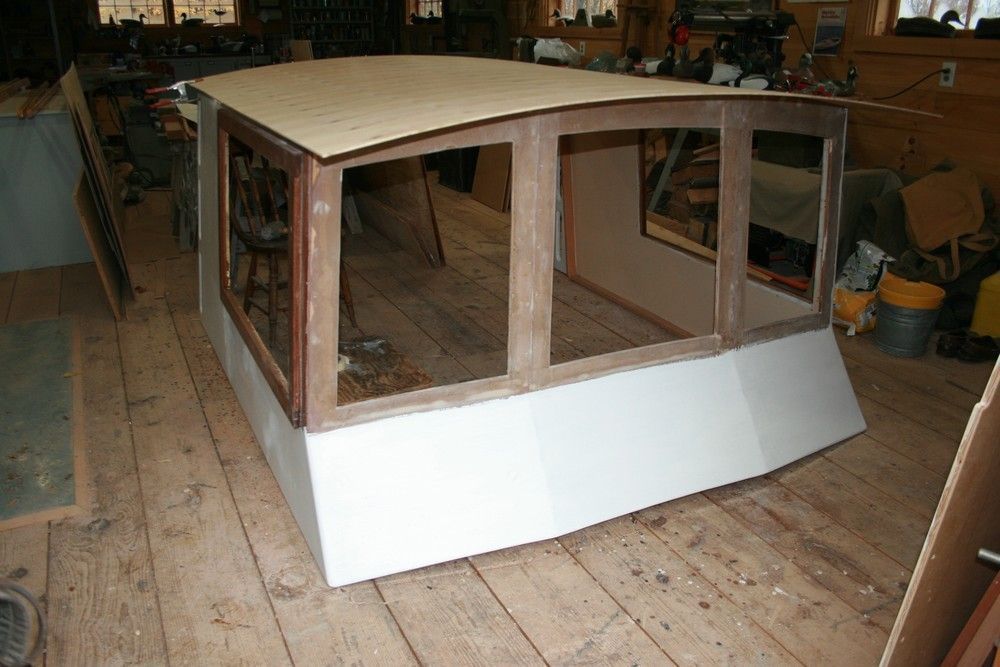
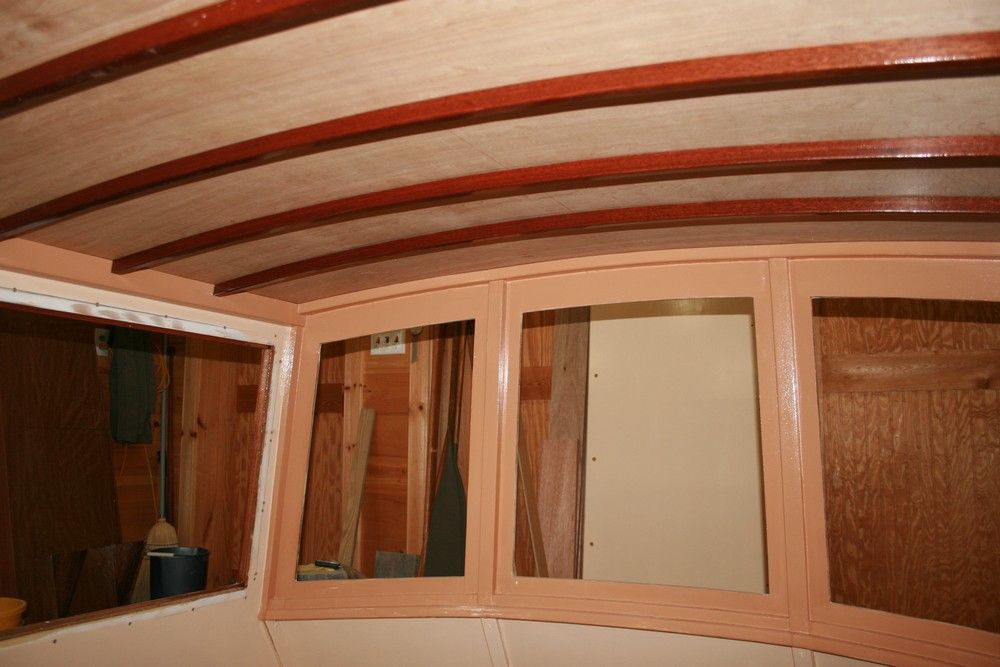
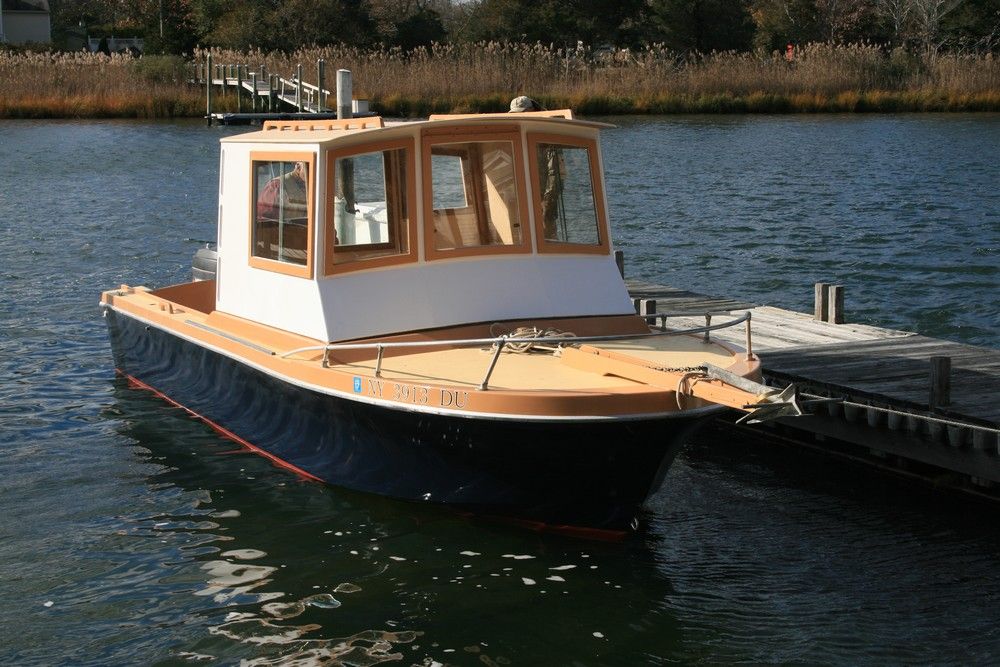
I have completed much of the pilothouse itself - more photos in next post. All of the roof frames have been laminated and varnished. And, I will be 'glassing the front later this morning. I built, 'glassed and finish-painted the two sides on the bench - before bolting them to the floor to frame out the front.
All the best,
SJS
Our purpose is to convert an open vessel into a mother ship/tender for open bay gunning - as well as for a host of other waterborne adventures throughout the year. As with any such project, it began by giving the boat a good look - and arriving at a conceptual design.
Actually, the first step was a phone call from Craig - reporting that the 150 Merc (Mariner?) was functional - his Dad had put it away carefully about 6 years earlier. Craig then sent me a couple of photos.
The raised coaming around the forward end of the cockpit provides an obvious foundation for a pilothouse.
The mother ship idea was inspired by many earlier vessels on Great South Bay - like the Broadbill - built by Brud Skidmore, owner of East Islip Lumber - in the early '60s.
I drew this sketch based on the photos - never having really inspected the boat - which is ~250 miles from Pencil Brook Boatworks.
A closer inspection was conducted a few weeks later.
She has a beamy hull with some modest deadrise up forward - and draws about a foot - a handy feature in the thin waters of Great South Bay.
The objective of my first visit was to gather some critical measurements so I could make some measured drawings AND - most important - devise a way to build a 'house in my shop that would fit on a distant boat. Here we are making a full-size "plan view" template.
The forward end of the cockpit has about 2 inches of crown in about 6 feet of width. We made a full-size template. Luckily, the sides of the cockpit were straight and flat - greatly simplifying the job.
Since the original windshield and the raised coaming area are 3-sided, I revised my sketch.
We consulted several veteran baymen - and planned a bowsprit.
And, little features like a step on the back wall of the 'house will help when getting up onto the deck to go forward.
The first job back at the shop was to laminate a forward "sole plate" by which the 'house - along with the port and starboard sole plates - would eventually be bolted to the boat. I made up a jig and epoxied 4 layers of 1/4" AC fir plywood.
I stapled plastic - an old shower curtain - beneath the jig to catch the inevitable drips.
Wrapping each cross-member in cellophane tape worked well the first time - but was replaced with the plastic after the second glue-up.
I made each laminate oversize so I could trim it to its final dimensions.
Notes are always critical to keeping the orientation of every piece as planned.
I use measuring cups instead of pumps - although I have a brand-new set of pumps in the cabinet....
As I do with my hollow decoys, I use snipped-off brass escutcheon pins to keep the layers from sliding around while clamping.
Here's that OCD - notice all the clamp handles headed south????
Back at the boat a month later, we first removed the windshield. I do not have a good photo - but you'll have to trust me that the forward sole plate fit perfectly.
The next job was to cover the wells in the cockpit so we did not fall while concentrating on other tasks. We screwed cleats into the forward well to support a floorboard - but the aft well already had a molded lip.
We are using MDO - medium density overlay AKA sign board - extensively in this project. The forward floorboard is 1/2 inch, the after is 3/4. Both will get 'glassed and sealed - and more cleats were screwed to the bottoms to stiffen them laterally. We painted them with non-skid deck paint (Interlux Interdeck). (BTW: You can see the forward sole plate in this photo but it is not in place.)
We bolted the sole plates in place then screwed on full-size templates - of 1/4" lauan underlayment - to mock it up full size.
We made numerous alterations: Lower windows and lower height were the most important. This mock-up stage was VERY informative/valuable - would not have wanted to build without it.
Then, back north with a load of altered - and annotated - templates.
I brought the floorboards back for final trimming, adding the cleats and finishing.
The notes and full-size measurements on the templates guided my construction of the actual 'house.
Lots of notes.
Out the starboard sliding window was Red Oster - steaming toward us - to chase us off "his" Great South Bay.....
First step was to revise my full-size drawings by transferring all the new information. The new lines are in red.
The other forward frames and the roof will have 3.5 inches of crown across ~ 6 feet. So, I made a beam compass with a 17.5 foot radius.
I cut the sides of the new jig with a straight bit in my bigger router.
I also worked on the appurtenances - like the bowsprit and the storage bench. I sent these back to Long Island with Craig in early October. I will need to modify the bail on the forward end of the 'sprit to get the anchor up, out of the way, and snug when not in use.
I re-purposed the tool box I had built for my '83 Ford Ranger - and made a new top from mahogany that used to be the stern sheets in a Daysailer. This storage bench will reside in the pilothouse - opposite the helm.
This grab handle will help the gunners getting in and out of White-Wing (our scooter/layout boat).
I have completed much of the pilothouse itself - more photos in next post. All of the roof frames have been laminated and varnished. And, I will be 'glassing the front later this morning. I built, 'glassed and finish-painted the two sides on the bench - before bolting them to the floor to frame out the front.
All the best,
SJS

")