What's on your Work Bench ? SEPTEMBER 2018

iMIE7IU.jpg

Progress on my first decoy that I started about a year ago. Work and home duties really took a lot out of me the last 10 months or so. I'm just now getting some time I can finish what I started and move on to my next decoys. This is a restless coated pink foam redhead. I still need to add tack eyes and some white to the bill. Can't decide if I want to add some more to the tail or not either. I learned a lot on this one at the end. I'm not happy with how it turned out, and honestly didn't even want to finish it after I primed it. But I am forcing myself to so I can always look back and see improvements.
 
Feeders are painted with Testor's yellow with gloss black added for the pupils, sealed with acrylic clear nail polish. Sentry, resters and crook necks get Shoepfer's 900 series seconds.
https://www.schoepferseyes.com/...ses-with-black-pupil

Sorry, I just checked this link. I found it resets to 5mm. I use 10mm in dark yellow. Sandhills actually have an iris very similar to that of a redhead drake.

Rick
 
Last edited:
Wowser!! I haven't been around for years and I finally after six or seven years ;-( got back to carving with the Kids today. I thought I should check out that old sight that I built my duck boat on. Boy am I glad I did, still great info all over. I haven't been in a duck blind much since the kids came along, but I am hoping that is about to change. My kids Emma (6) and Jack (4) working on some cork gunners. I'm a little more then rusty but it's kinda like riding a bike.

29790426017_26edef8469.jpg


29790426967_8939766628.jpg

 
Last edited:
Brad

Great to see you again. Handsome kids you've got there. Stick around, still the best group of duck hunters on the net.

Eric
 
Good morning, Brad~

Great to see you back - and with a Band of Helpers!

I look forward to seeing the fruits of the team's labors.

All the best,

SJS
 
These are nearly done, with the exception of eyes glued on and some feather edge highlights and a couple of raw sienna washes. I have another eleven painted with feather details on one side, but the weather just finally turned more fall-like. We hunted a farm down by Manistique yesterday and did well, despite our persistent "gadfly" company. Close to five hundred cranes in two adjacent cut oat fields.View attachment 001.JPG
 
RL~


That flock (herd?) shows lots action - great job.


Do you need a Crane Crossing sign next to that blacktop????


All the best,


SJS

 
My painting station is on the south side of the driveway, consequently, these birds have made the "crossing" a number of times; note the thread bare grass on the edge?

Geese have been crossing Superior in good numbers now, riding the wind shift. Several hundred bird plus flocks flying high over the house in the morning.

Rick
 
Bob, the worst part of painting gaddies is the scapular edging . Getting that cinnamon color STILL baffles me. The rest is basically grey, brown, black, white and buff.[;)]
 
George, all I see is blending, overlapping feather groups and vermiculations! I'm working on one now only because an order was placed by a regular customer. Hopefully it turns out ok.
 
I had a few beat up old Beans in the shed that I decided to fix up and put into use this season. Here are a few before pictures.
View attachment beans 1.jpg
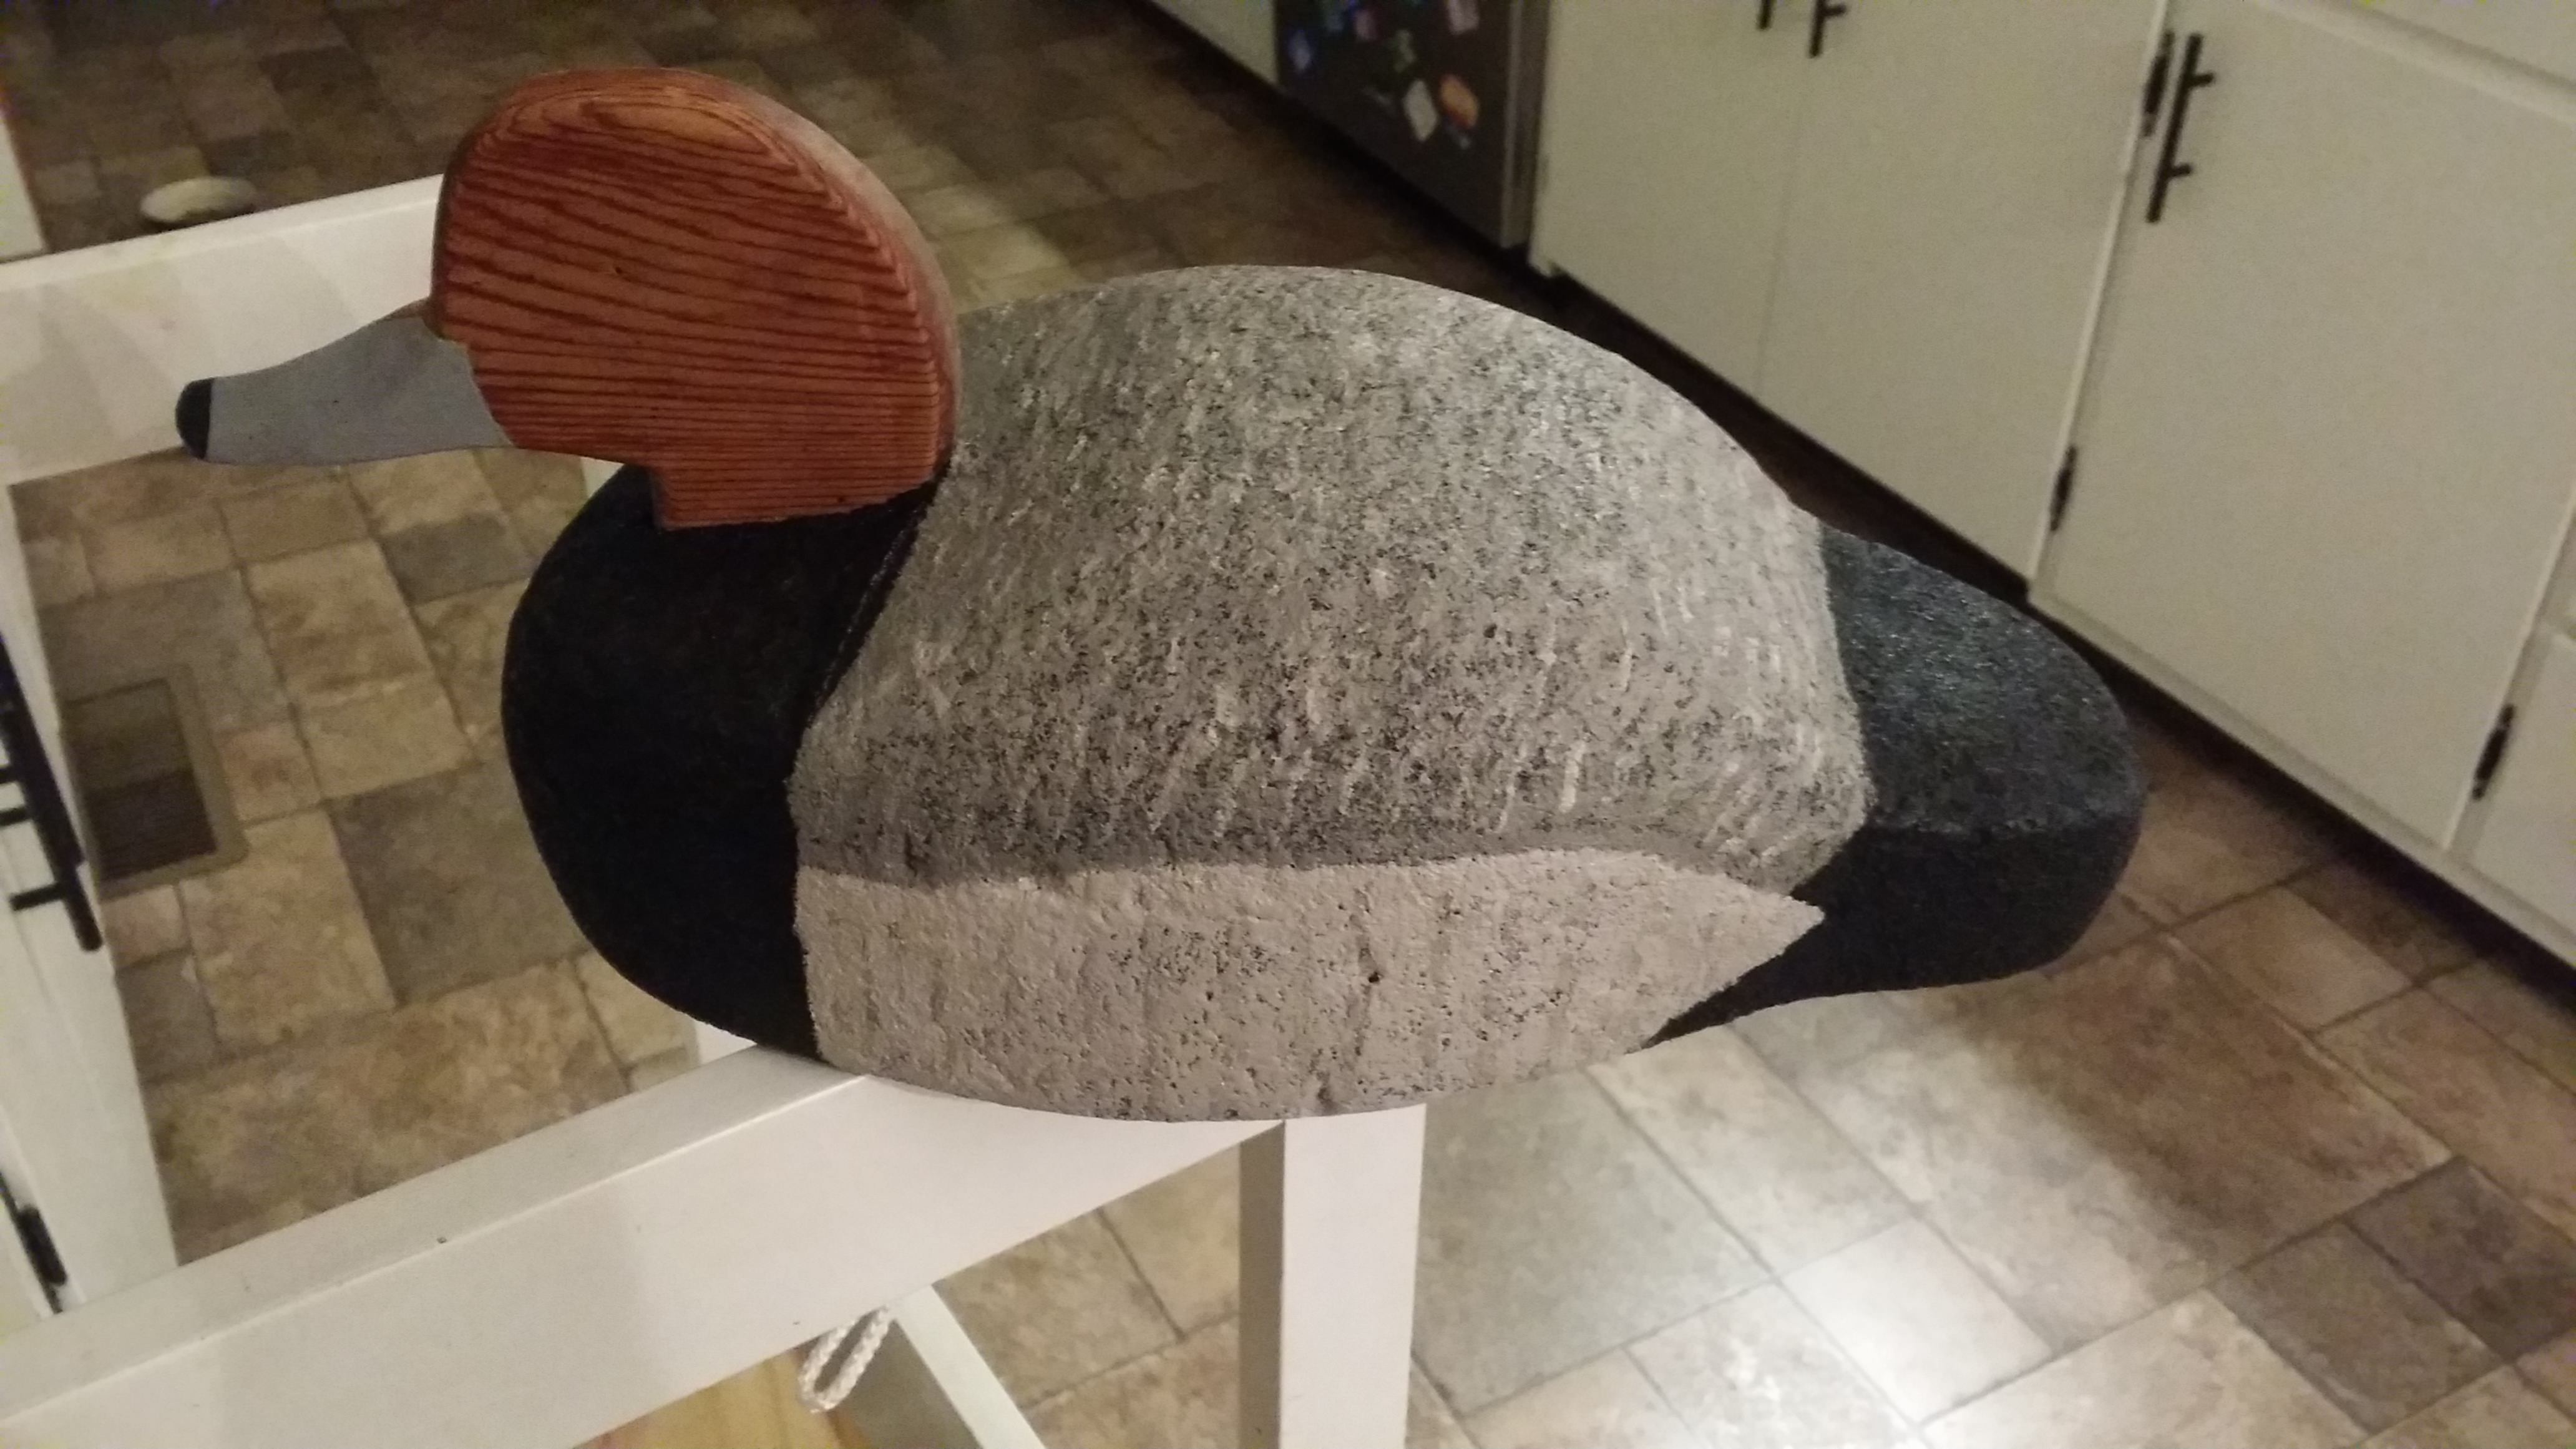
And some of the heads. These were in pretty bad shape so instead of making a repair I decided to cut them down and make them into a resting position. I did this by cutting the old dowel down, then re-drilling a new hole more forward, then glued in a new dowel.

View attachment Bean heads 2.jpgI


View attachment bean10.jpg
Much to my surprise these were made from refrigerator type cork so I thought I would give the burnt cork process a try. I totally removed all the old paint and varnish from the old girls. I applied a little heat from a heat gun then used a palm sander. The paint was very old and came right off. I then made a mixture of linseed oil, turpentine and japan dryer and applied it to the decoys. I used a torch and set each on fire. Very briefly!
Then painted more of the mixture on and rubbed it in. On some of the birds I had to do a little spot scorching and more rubbing. The final step was to add little Minwax Jacobean stain to the linseed oil, turps and Japan dryer and rub that in as well. The bottoms were varnished in several coats of spar varnish. (All the decoys still need some flat paint applied over the varnish). The heads were repainted in the J. Sanford school of decoy painting and attached with a new round head # 10, slotted brass screw and a silicon bronze fender washer.


View attachment burnt black duck3.jpg Rester pose.

View attachment burnt black duck2.jpg Drinker pose.

View attachment burnt black duck4.jpg
The whole gang.


I have a bunch more in the refinishing process, but they seem to made from black cork, although the seem to be about the same vintage?? These are to be mallards. It will probably be a while before the mallards are finished as I am having a heck of a time painting the hens. Practicing on some old foamers right now. I hope to post up some finished mallards next week.


View attachment thumbnail.jpg
Here is one of the bottom. Still needs some paint to finish it off. The screw and tag were added for illustrative purposes, but will have to come off to be painted. I hope you enjoyed the pictures.

View attachment burnt black duck1.jpg
 
Back
Top