Progress Reports - A Duck Wrangler and a South Bay

Steve Sanford

Well-known member
Good morning, All~


I'm dashing around trying to complete two gunning boats. And, I need to make some White Pine Roping and hang our Christmas lights this morning - before we pick up my daughter's family - who are flying in from Berlin for the holidays.


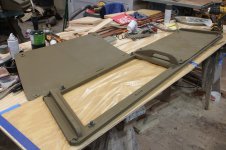
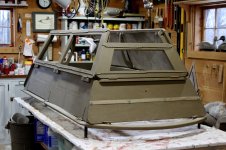
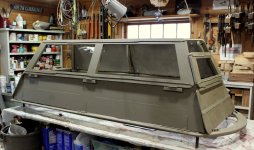
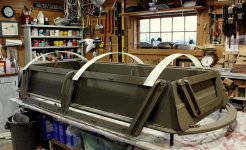
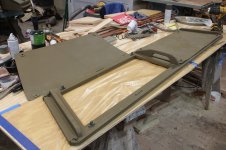
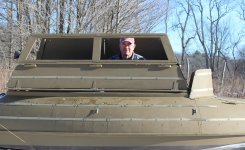
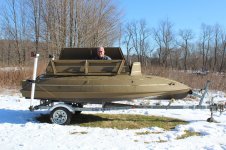
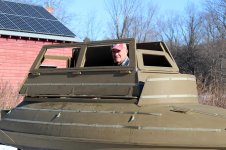
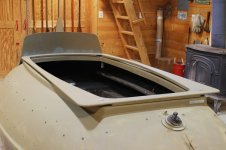
This Duck Wrangler is getting a general rehab plus a wooden "superstructure" to hide two gunners sitting on buckets. Part 1 is done; Part 2 is still on the bench - all built but needing assembly and final touches.
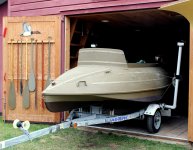

Wrangler - Emerging.JPG


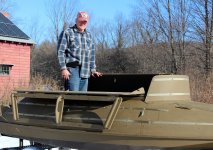
I've added one of my XL Spray Shields - the same as I use on South Bays (and a Duck Invader last year).
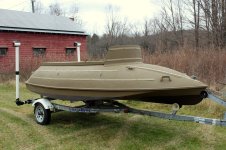

Wrangler - Portrait - bow quarter.JPG


The blind will have 2 levels, each folding down. The lower level is opaque (plywood) and the upper tier is open framework (White Pine lumber).
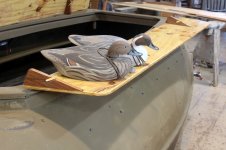


Wrangler - Port Flapper level for decoys.JPG


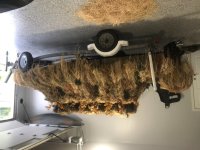
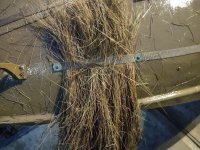
Notice that we're trying webbing (polypropylene) instead of traditional wooden thatch rails. I got the idea from Ken Deckman on Long Island. They should save weight, cost and Salt Hay. The stock heavy grab rails do not work well with Salt Hay as the spacing is very large - and have been removed.
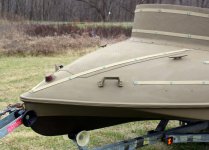

Wrangler - Portrait - Foredeck.JPG


The South Bay is getting my usual "spa treatment" - all new wood throughout, plus a larger (XL) Spray shield, a transom drain, Beckson deck plates in the flotation chambers, and some new hardware. The bottom was generally good. I just filled and faired several dings and divots.
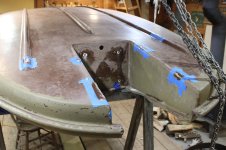


Tuffin - Hull repairs and prep.JPG


The bottom itself was not painted. I sealed some worn spots with straight epoxy and painted the "topsides" up to the rubrail.
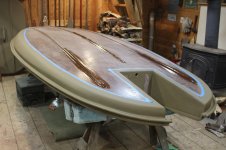

Tuffin - Bottom taped and painted.JPG


I fitted the outboard's clamping pads to a 'glass "keeper" on the new motor board. Instead of boring shallow sockets as I have for years, this approach allows for the replacement of just the keeper if a different motor is used. The keeper is bedded in window caulk and NOT 3M 5200 - so it can be easily replaced if needed.
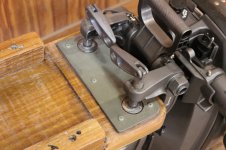


Tuffin - Motor plate bored for Mariner.JPG


Here's the first coat of topside paint - Parker's Marsh Grass. The new thatch rails, spray shield, motor board and hardware have been installed. New floorboards are done - but the flap boards still need finishing and installation.
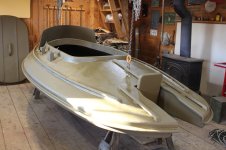

Tuffin _ Topside Paint - first coat.JPG


I almost advised the owner that a new motor board was unnecessary - but closer inspection revealed this "spacer board" between the motor board and the 'glass hull. I am wondering if the date had been recorded where the rotted plywood is missing. In any event, this installation failed because silicon was applied only near the bolts - but NOT over the entire mating surface - allowing moisture to seep in and stay there, supporting decay. It is one reason why I make my motor boards with a pair of standoffs: much less surface area in contact with the 'glass hull. And, I am careful to spread 3M 5200 over the entire mating surface (as well as along the entire shaft of each bolt) during installation.
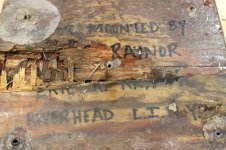

sm Rotted plywood between motor boaerd and hull.JPG


Stay tuned!


SJS
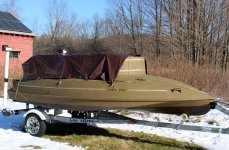

 
Nice work so far Steve. I always enjoy seeing what you do with the boats. I'll be watching that DW...love that boat!

Steve
 
Good morning, Steve~


This is the first Wrangler I've worked on - and crawled throughout. I am very impressed with both the design and build quality.


I'd like to know more about their history. It doesn't seem that they are currently in production. Based on the HIN, I'm guessing this was built in 2000.


All the best,


SJS

 
I always assumed the small duck wranglers were basically a design based on 14' sea class TDB,s. Have you been in those Steve and are there many differences?
 
Beautiful work as always Capt., those Duck Wranglers were originally made by Tom Ayers, then taken over by DuckWaterBoats in Ohio I believe then. Steve Hoover was last owner. Tom Ayers started the company in late 90's then sold it, I believe the originals had WGR in the serial #'s from ones I looked at. I think he is making the "Duck Invader" now. Lots of times these manufacturers change names to avoid warranty liabilities / legalities.... The only horror stories I've personally heard was the floatation foam under the floor holding water overall they are some solid boats some even say better built then the TDB's of the earlier days. I think he stopped making them in 04-05
 
Steve,
I'm really enjoying this thread. I always enjoy your boat rehab projects. I love how you can revive an old wood boat, and also a "modern" glass one too.
Great work again.
 
Steve~


Here are some quick shots of the blind. It's mostly assembled.


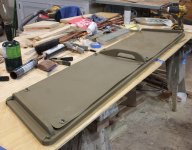
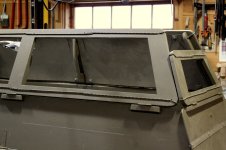
Here is one of the upper frames. This one has what I'm calling "weather panels" attached with Permalock turnbuttons. These fasteners allow the weather panels to be switched from one side of the vessel to the other - in just a minute or so.

A bit of backstory: On my original sit-up blind (for my Sneakbox) I used an open framework for the shooting side and solid plywood for the windward side. We always set up so that we would shoot out of the port side. An earlier customer - with a South Bay - wanted to be able to shoot either side. In that case, I sewed up "weather cloths" to be snapped to the windward frame.

On this boat, I had thought of making weather cloths - but the lower thread on my sewing machine is "feeling under the weather".... So, I found some 1/8-inch vinyl and - after cutting 2 pieces to size - I primed and painted both sides of each piece. Here they are snapped in place. The big handle allows for the shooting frame to be raised or lowered whilst gunning.

Wrangler - Lateral Frame - on bench with weather panels.JPG

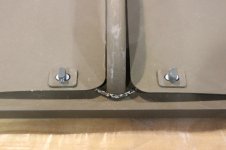
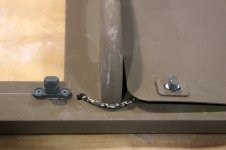
Here are the Permalock turnbuttons - 4 for each panel.

Wrangler - Permalock turnbuttons on weather boards.JPG

The panel has been removed from the left - but not yet from the right.

Wrangler - weather boards - one off, one on.JPG

The larger perspective.

Wrangler - Lateral Frame with on weather board off and one on.JPG

Here's the blind with all frames - 2 lateral, one fore, and one aft - up. (Aft is down because it's clamped up right now.) Note that the lateral "lowers" are hinged to lay level with the water - as when picking up stool; the forward and aft "lowers" get removed entirely when lowering the sides. (This will be much clearer when the blind is on the boat outside.)

Also, the thatching strap is attached in this photo to the forward lower - but the other 3 sides are still "strapless".

Wrangler - all boards up.JPG

Here's a view of the shooting side - with the weather panels fastened onto the windward frame. All of the frame will be "thatched" with bundles of Salt Hay lashed every 3 or so inches to the heavy cords at the tops and bottoms of each frame.

In this view you can see the chalk line where the webbing will be fastened - tomorrow?


Wrangler - blind shooting out of port side.JPG

Here's a closer shot of the "shooting frame" as well as the "solid" windward frame. The latter hides the gunners' silhouettes and also keeps the wind out of the cockpit.

Wrangler - blind showing shooting port and weather boards.JPG

The blind with the frames down - for trailering or storage. The 'glass bows - in progress - will support a canvas cover to keep rain, snow, leaves - and falling ducks ? - out of the boat.

Wrangler - blind with all boareds down and cover bows mocked up.JPG

Stay tuned!

SJS

 
Last edited:
Ken~


Thanks for the kind words.


I believe it's a 13-footer - and maybe built in 2000 (from the last 2 digits of the HIN.


I will find out more from the owner when he picks it up later this week.


All the best,


SJS

 
Steve

That is a very well thought out blind design that I'm sure others in the future will want to copy. I wasn't able to tell the construction method you used for making the frames. What joinery method did you use for the rails and stiles? I see no signs of pocket joinery nor half laps. Dowels maybe?

Eric
 
Last edited:
Eric~


Because I considered but used neither half-laps or dowels - and because the stock is just 3/4-inch White Pine, I fastened cleats across the joints - 3 for the sides (the central one being a large handle for raising and lowering the side stealthily) and just 2 for the ends.


Wrangler - Lateral Frame with on weather board off and one on.JPG


Simple but strong (kinda like the builder).


SJS


steve nylon 1 inch webbing is what marsh hawk came with it was pop riveted to deck special washer pop wth washer built in an washer under deck still on my hawk 16 years i got olive color that blended nice with boat color ken had bought one of the hawks back in the day the strap was so tight you would have to slide half inch wide quarter inch tall under then turn up to stuff salt hay
 
Rick~


That's good to hear about the longevity. I anxiously await reports - and photos - from the field.


I used s/s fender on the outside , fastened (wherever I could) with s/s machine screws and fender washers and nylocks below decks.


Merry Christmas!


SJS


All~


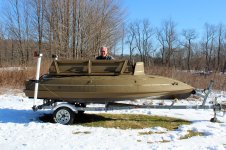
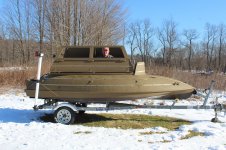
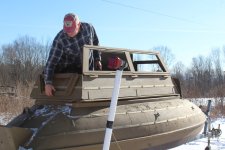
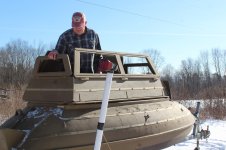
Here are shots with the blind installed. The owner drove up yesterday - and hauled it back South after some orientation and a minor addition. This is the first time the completed blind has been mated with the vessel itself. As I showed earlier, it is secured by the 4 "pins" in the corners and lashed down to 4 small cleats. Total installation time about 1 minute. The smiling (Whew!) owner is sitting atop a spackle-bucket-with-cushion-lid.


Wrangler 1 - Blind on Boat - all frames down.JPG


Here it is with both side frames up. As described earlier, the removable weather panels can be quickly moved from the port frame to the starboard frame if desired.


Wrangler 3 - Shooting Frame and Weather Frame up.JPG


Shooting frame up. It will get bundles of Salt Hay lashed every 3 inches or so across the openings. Note that the frame is just taller than the gunner's head.


Wrangler 4 - Shooting Frames up - head viz frame height.JPG


Here it is with the "weather frame" up and the "shooting frame" down. This is how I would wait for birds - slowly pulling the shooting frame up when birds are spotted.


Wrangler 5 - Shooting Frame down and Weather Frame up.JPG


The aft panels are easily installed and removed - and would generally be out when operating the engine or retrieving birds, etc.


Wrangler 6 - installing aft panels.JPG


Here's the upper frame - to hide the gunner from aft. Note the "step handles" on the afterdeck. Although the stock Wrangler has 4 for lifting, we added 2 to the afterdeck to help with ingress and egress - notoriously challenging on these tall vessels - like TDBs, Invaders, et cetera.


Wrangler 7 - installing aft panel - note step handle on afterdeck.JPG


The upper frames at the ends are a bit lower than the sides. This allows them to be folded down - behind the Spray Shield in the case of the forward one.


Wrangler 8 - Shooting frames up.JPG


The lower boards lay flat - so decoys can be set on them when rigging. Just one side down may be all you need when rigging - experience will tell.


Wrangler 9 - Stbd panels down and weather board up - for rigging.JPG


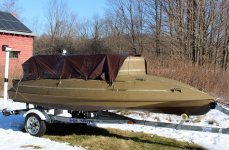
I finally repaired my sewing machine (lower thread tension fixed with a new bobbin case) - but did not have time to sew the storage/trailering cover. The owner has a neighbor who does canvas work - so I just sent along 3 yards of Sunbrella, a drawing, and a few odds and ends. For the trip home, we secured this cheap tarp over all the new work. It survived the 200+ miles back home.


Wrangler 10 - Tarped for travel.JPG


And, I just got this photo from the owner. Lots more Salt Hay needed - but the webbing does its job.


Wrangler 11 - Thatch in webbing.jpg


All the best,


SJS


Wrangler 10 - Tarped for travel.JPG
 
Good morning, All~


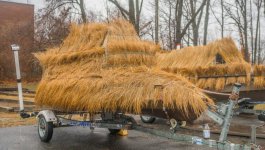
One highlight of last weekend's Long Island Decoy Collectors Association Annual Show was the convention of duckboats - organized by Anthony Babich. For me, I got to see the blind on the Duck Wrangler all thatched up for the first time.


Scott Amberman Duck Invader - cropped.jpg


The owner did an exceptionally thorough job. I was too busy all day, however, to photograph her with flaps in the various positions. In any event, she will now look like a haystack out in the saltmarsh - the "hay" being Spartina patens.


All the best,


SJS


Steve, do you have inside photos of the blind to share? Curious how you secure the bottom half in the up position? I am sure there is a well thought out method.
 
Dave~


I do not have all the photos I'd like. I'll be sure to get the ones I need next Fall. In the meantime, here's a re-cap:


This is the base of the blind - the toughest piece to design and build. Note that the Spray Shield is not part of the blind; it is fastened to the foredeck.


1 Wrangler - base on hull.JPG


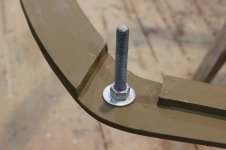
As you saw in my shop, the base is located by 4 "pins" - one in each corner. You will recall that each pin was sheathed with a length of rubber hose. (I cannot find a photo....) The hose prevents chafe and rattling - but is still small enough so the 4 pins (1/2-inch carriage bolts) drop into each hole - and are removed easily as swell. I used the existing Wrangler sockets in the coaming.


2 Wrangler - carriage bolt as pin.JPG


The base is dropped onto the coaming and held down by 6 cleats (one at each corner of the cockpit and 2 amidships) and short lengths of heavy tarred decoy line.


3 Wrangler - base cleats.JPG


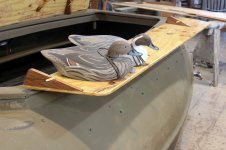
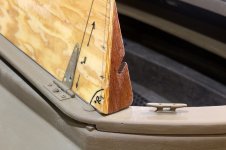
The lower flap boards are hinged to the base - and lay flat when down - to aid in handling decoys. Note the slotted, triangular chocks in each corner. They hold the flap boards upright when secured.


4 Wrangler - Port Flapper level for decoys.JPG


Here is the flap board up - in gunning or traveling position.


5 Wrangler - Stbd Flapper up - with chock and keeper cleat.JPG


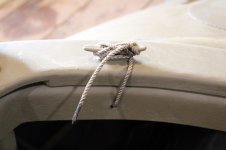
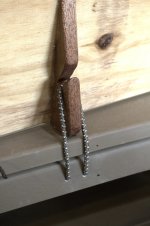
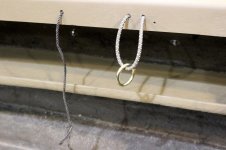
A loop of 1/4-inch shock cord - tied behind the coaming with a square knot - pulls downward on the flap boards, 2 for each board.


6 Wrangler - Flapper Chock and shock cord FIXED.jpg


Because the shock cord is tight, I added a brass ring to each as a finger pull.


7 Wrangler - Blind Base Lashing and Flapper Keeper.JPG


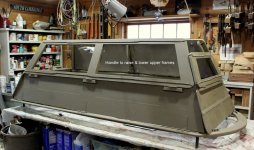
The upper "frames" - up for hiding and down for shooting - have a large wooden handle amidships. It is used to raise and lower the frames when gunning. I think (?) I added a small thumb cleat below each on the flap board so it could be secured if needed - as when running. The fore and aft flap boards and frames are secured differently - with a combination of chocks and gravity. The aft flap + frame is easily removed and stowed when one needs to exit the boat or use the outboard.


8  Wrangler - blind shooting out of port side with text re handle.JPG


Make sense?


SJS


View attachment 6 Wrangler - Flapper Chock and shock cord.CR2
 
Steve

I like seeing all the detail you've provided with this blind. I don't know about you, but I frequently find the actual building time of a project to be the smallest component of the total build. The time to come up with the idea and flush it out and then gather supplies takes up more time that the actual cutting and assembly time. This would have been one of those projects for me.

Eric
 
Back
Top