Chris Judson
I’ve always been into the the history and lore of duck hunting and have always loved the sneekboxes, melonseeds and Delaware duckers. I guess it was just a matter of time before I'd get seriously into Duckhunting. I thought I would share some pics of a duckboat I designed and built during the winter of 1999. I hope they are viewable. I took them with an instamatic because everything in my shop eventually gets epoxy coated and I couldn’t do that to a good camera.
I just got into duck hunting 2 years ago when my sister bought me a black lab puppy for Christmas (what a great sister !!). I started doing retriever drills with holly-bear and got more and more interested in duck hunting. That season I got to hunt 4 times, got my first mallard and was hooked. The next obvious step was to build a boat. As I’m always looking for an excuse to do that. I thought for the type of hunting I was doing TDB Company 14’ would fit the bill, but I wanted to build the boat. So I looked into Devlin designs Mallard plans and using cad created a 3d drawing of the boat. Still I wanted to build a boat to my exact wants so I needed to design it.
After a little web research I came across plyboats software on the net and grabbed a copy. That convinced me I could design the boat I wanted. Using Plyboats software I input data 5’ beam, 14’ length, 3' draft and plyboats created a wireframe drawing that can be worked on in AutoCAD. Plyboats software also gives a cutting template of plywood in the flat form, greatly easing all the calculations, just print full size, lay over plywood and cut! Instant stitch and glue. After a week of fiddling around I finalized the design and imported the info into AutoCAD and created a 3d drawing with sections taken where bulkheads would go. That allowed me to plot and cut full size patterns.
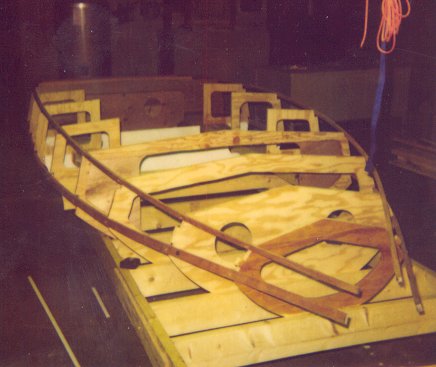
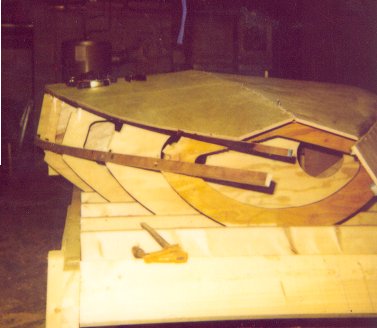
All my boats I’ve built in the past have been built upside-down on a jig, so not ready yet to try stitch and glue completely I made a jig and fastened the bulkheads to it. Then put in ribbing, strips & shearclamp. I knew I wanted a full-length shelf on both sides of the boat so I cut the bulkheads to accept it and then filleted around them with west system filler/epoxy. That really stiffened the boat up. Next I cut and mounted the stern & bow out of 1" mahogany. Then it was time to overlay plywood. I transferred the plyboats pattern to ply and cut the bottom and sides out, mounting the bottom first. All fastenings were stainless and I glued the floor right to the bulkheads then ringnailed with ss fasteners. A couple of passes with the power planer and the sides were ready to mount. They mated up amazingly well considering this was my first time using the design software and after some sanding and cleanup I was able to glass cloth the exterior.
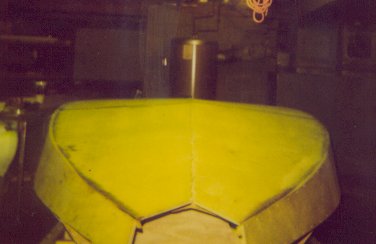
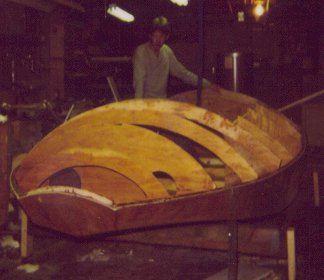
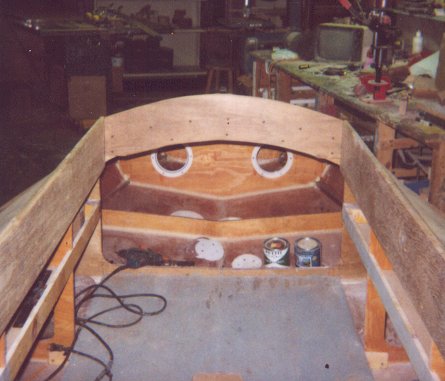
Duck season was drawing very near and I was hopping to have her ready. Next step was to separate the boat from the jig and flip it over. All seams were filleted and since the second bulkhead in the bow and last in the stern serve as watertight floatation I installed deckplates with o-ring seals. The floor went in next, just simple marine ply (though I really wanted a nice teak floor). The inside was shaping up well and it was time to fasten the deck. Due to the large curving deck I decided to strip plank it with 1" strips of marine ply. That was quite a job and needed a ton of fairing to get it smooth. That done I was ready to cover the deck. Next came the keelson and runners on the bottom. Coaming, camo blind, assorted odds and ends and she was ready for the water. Only problem was the date was April 1. A few months to late, oh well next years a different story. I launched the boat over Easter weekend and she floated great. The boats super stable and only draws a few inches.