Rick Reid
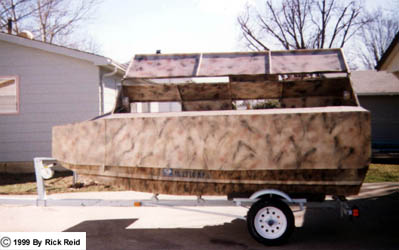
My duck boat was designed with several things in mind. I wanted a small, yet roomy boat that could hunt two guys and my best friend, Honda (a Black Lab). I needed it to be lightweight and operate very well in all conditions. I looked at several options and kicked around the idea of buying a ready-made blind or just building something simple. I liked the idea of a hard blind, but since I have a 12 foot Jon Boat, I was a little concerned about the weight factor. My original plan was to build a tubular frame and sheet it with plywood, but that would be too heavy. Instead, I designed a lightweight, hard blind using a tubular frame covered in 026-aluminum sheeting. I figured that the completed design would weigh less than 100 pounds. It was final, and the cutting, welding and cussing began.
The Stake Pockets
I'm partial to hunting Waterfowl, but I also have a passion for chasing Largemouth Bass, so I wanted to set my boat up to hunt and fish. Thus, the blind had to be removable. I figured the best option was to make stake pockets for the legs of the blind to sit in. There are four stake pockets made from 1-1/4" aluminum tubing and Ľ" aluminum plate. They are pitched to the angle of the sides of the boat. Each pocket has six mount bolts and two bolts to secure each leg when the blind is in place.
The Frame
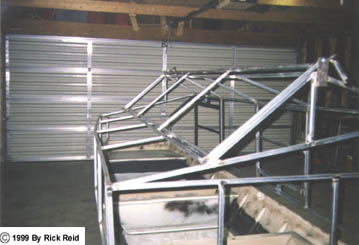
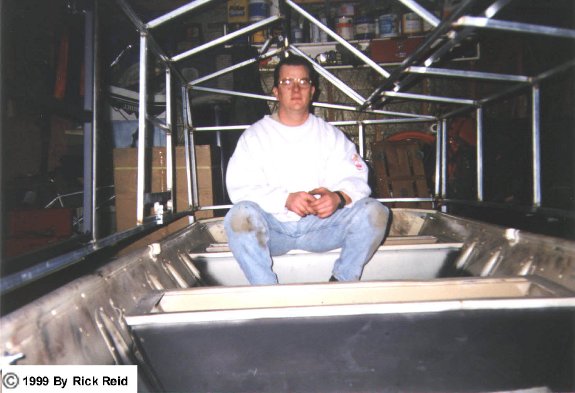
I started the frame by placing sections of ľ" galvanized tubing into the stake pockets. Next, I placed the top rail on, ensured it was level and tack-welded it in place. Then, I sat in the boat to determine the height I would need for the wall on the non-shooting side. After determining this, I cut the stakes and the top rail and tacked them in place. Then, I connected the two sides in the front and rear. I decided to box off the rear on both sides of the motor to keep the wind from howling through the back of the blind.
I was originally going to put a door in the front of the blind. However, as I was cutting and welding the pieces together, the front of the blind started looking smaller and smaller. After sitting back and looking at the whole picture, a light bulb came on. The wall of the non-shooting side is 28" tall-large enough to accommodate a hunter's door and a dog door. I decided to make a dog door/ramp between the front and middle seat, and make a hunter's door in the rear, between the back and middle seat.
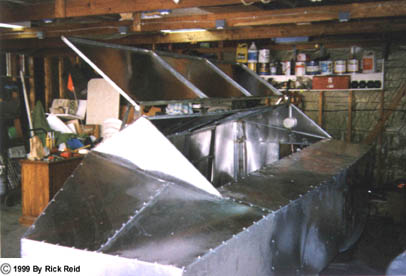
The Shooting Lid
I wanted to make the shooting lid as small as I could, yet big enough to provide a way out. I wanted it to close tightly and shed water, but open quickly. The opening for the lid is 9'6" wide and 22" deep. It is just perfect for two guys, but there is room for three if needed. I built a pivot on each end with Ľ" plate, drilled a hole through the plate and frame, and put a bolt through for a hinge. This allows the lid to pivot freely and to open all the way. The lid has bungee cords attached for fast opening.