
Steve Sanford
Well-known member
All~
As promised after seeing Mother Diefenderfer's fine handiwork earlier this summer, here is a step-by-step of a motor cover I just finished this morning. I am not a professionally-trained canvas worker (one of my few regrets is declining an offer of part-time work in a canvas shop on Long Island....) - so there may be better ways to accomplish a similar project. However, I have sewn miles of seams in custom canvas over the years - so this information may be helpful to other DIYers.
The customer initially asked me to paint this motor but I suggested this canvas alternative. There are 2 main benefits to canvas - in addition to the obvious superior hide. One, you retain the trade-in value of the motor if you want to swap it out for something else. Second - more important in my mind - having a motor that will flare birds persuades one to take the few seconds each time you rig the boat to cover the motor. I hunted with a white Johnson for many seasons. Unless there was lots of snow around. the motor got covered every time. I concede that wet covers can be a bit messy but I always just lay mine on the stern deck - so it would drain overboard - when running out to pick up downed birds, etc. (It rides in the cockpit when in transit or storage.)
Here are the main tools. The Sears Kenmore is a common, home duty machine - a wedding gift from my parents to Susan and me 40 years ago. Keep it clean, lubricated and use the right needles and thread and you're good to go.
In order to hold a large spool of thread, I had to make a "bushing" from an old mop handle.

Other key tools are sharp scissors, seam ripper, chalk and - VERY IMPORTANT - Seamstick basting tape. Canvas is tough to pin - to hold everything in place while sewing - and this double-sided tape does a great job. The other "worth its weight in gold" item is pre-wound bobbins for the waxed nylon V-92 thread. I buy 10 or so at a time. They save LOTS of time and frustration when the bobbin thread runs out - because they take just a few seconds to switch.

An iron, too, is essential. All the seams should be ironed before going through the sewing machine. Set the temp for "synthetics".

I buy my canvas from either Sailrite (http://www.sailrite.com/) or Sailmakers Supply (formerly Mainland Sails - http://www.sailmakerssupply.com/). Sailrite has lots of helpful information on its website. For example, it can recommend the right needles for your specific sewing machine.
I use Sunbrella Marine Fabric. It is a polyester fabric and comes in 46" and 60" widths. I used the 46" for this project. I tried a new (to me) color: Tresco Birch. I think it's a good match for salt hay. I also like their Tan.

I squared up the canvas, marked a center line, then hemmed the bottom. Spring clamps are handy "helpers" in any one-man shop.
I cut the canvas a bit long and then duct tape it in place so I can refine my design/measurements and mark it. I was scolded by a sailmaker for marking with pencil once - so I now use chalk unless I need bold lines on the inside.

Here it is taped in place. I can now firm up my design and mark the actual dimensions.
The tedious task is sewing the nylon webbing in place. It is much easier, though, to sew it in place BEFORE you sew the cover into its final shape.
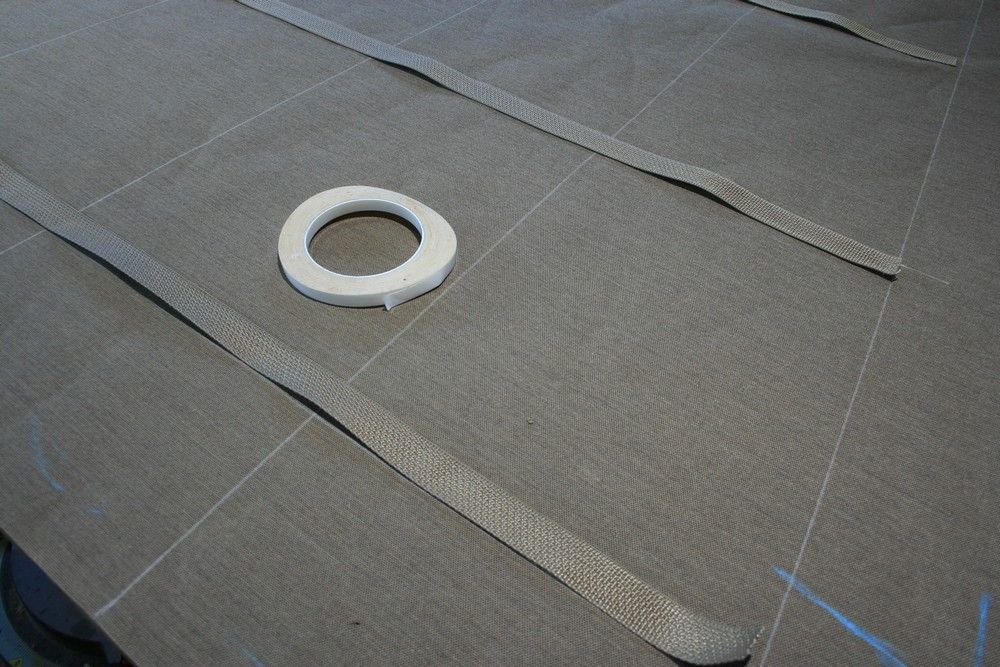
I use the Seamstick to tack the webbing in place. I separate the paper from the adhesive with the tip of my seam ripper.

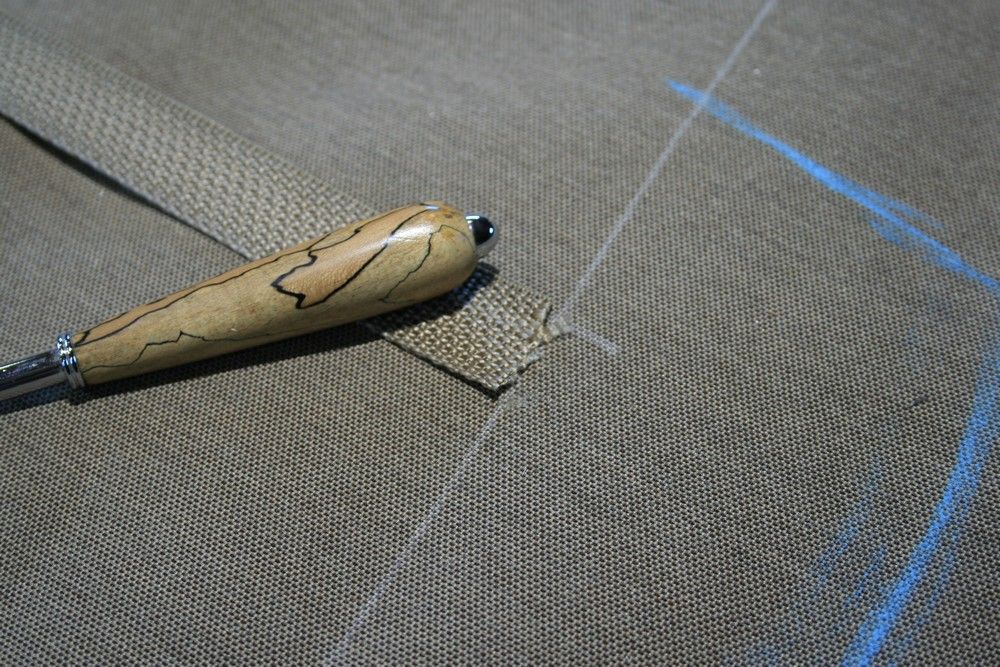
I use the handle of the seam ripper as a seam rubber (I have a real seam rubber somewhere....) - to force the adhesive into the weave of the webbing.
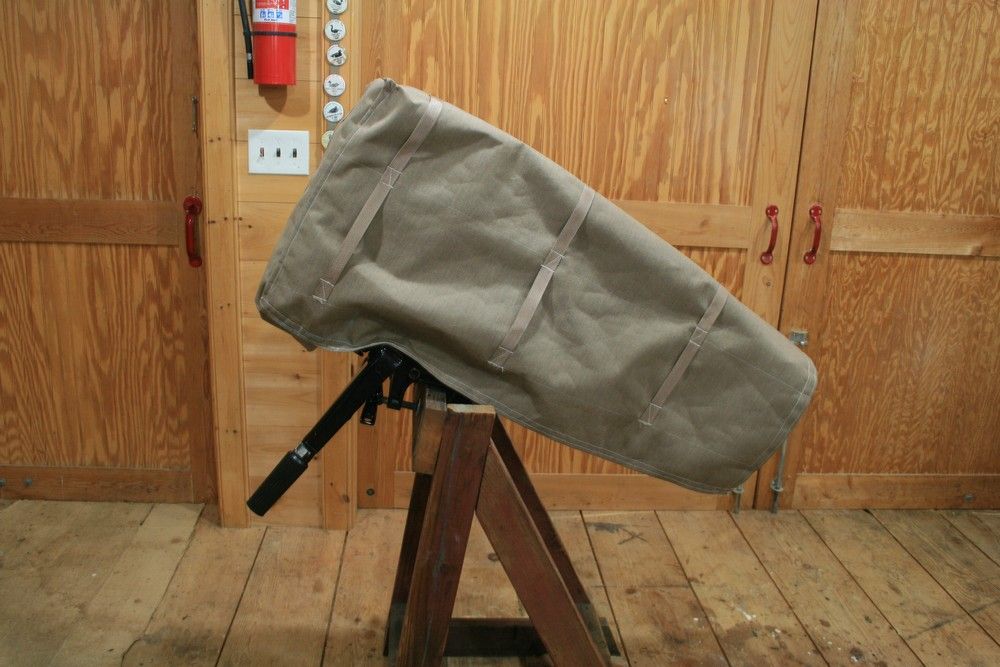
Here are the sides (sides and back are a single, wraparound piece) and the top with all of the webbing sewn into place - and ready to be sewn together into a cover.

First I sew the top - across the back - and then the sides. I stop the sides after 20 inches - a bit longer than the motor's "hood". I check it for fit while it is still inside out.

Next, I figure out how I will finish the front of the cover and tie it into the side panels. This is the all-important "doping it out" process I learned from my Dad.

For some reason, this view has me thinking Darth Vader.....

I'm not sure thatching will be necessary on the top - but now was the time to sew the webbing there.
The side panels sweep aft a few inches.

It is long enough to cover the lower unit and prop. But....that black handle needs some attention.
This little sleeve can stay on all the time.
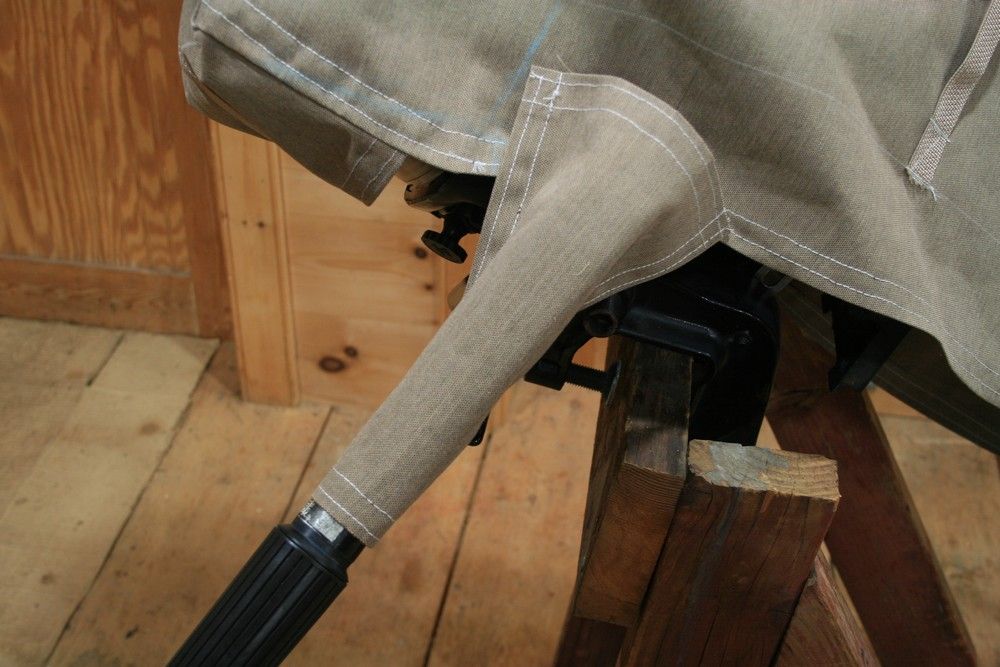
It is open inside to allow access to an adjustment knob (whose purpose I do not know - being an OMC guy....).

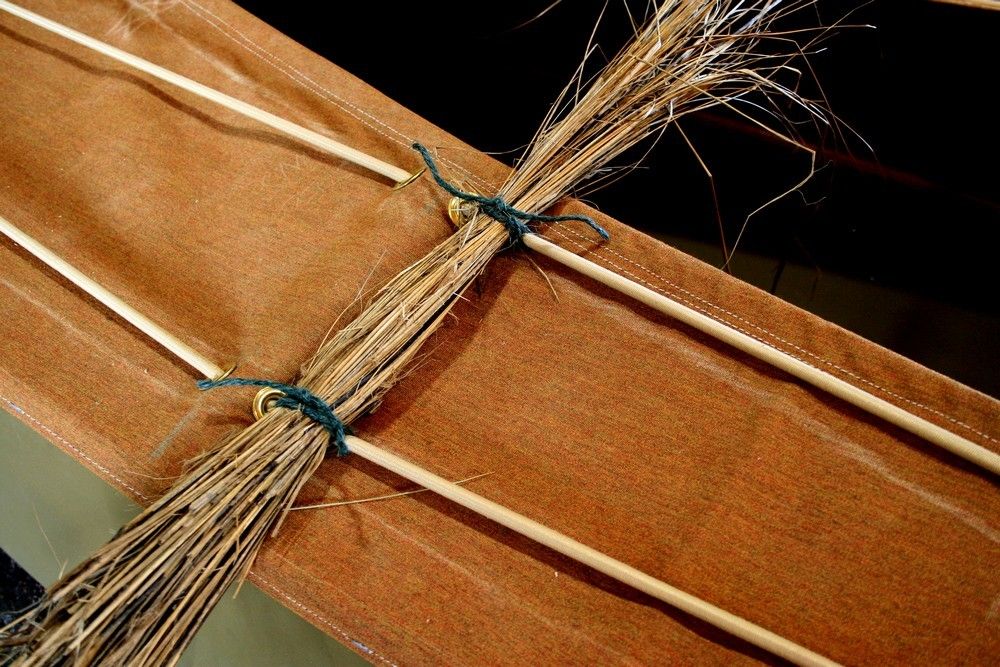
Bundles of thatch should be lashed to the webbing every few inches. I like to use a jute twine - it's the right color and is easily cut and discarded with the grass (both biodegradable) after the season.

The bundle below was photographed on one of my Gunning Boxes. A square knot (reef knot to you sailors) does the job.
Hope this helps!
SJS
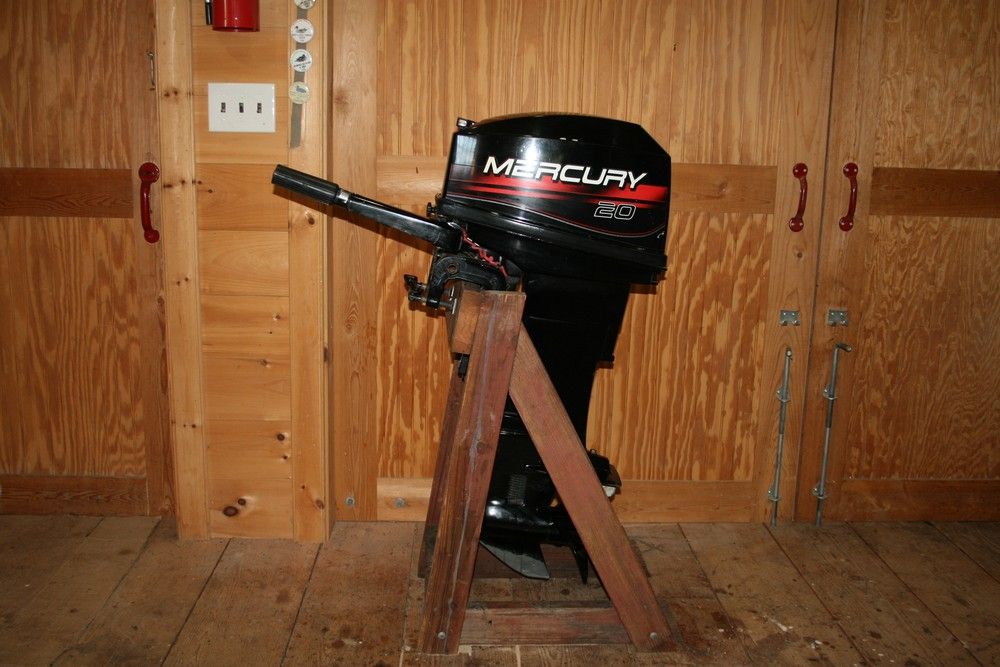
As promised after seeing Mother Diefenderfer's fine handiwork earlier this summer, here is a step-by-step of a motor cover I just finished this morning. I am not a professionally-trained canvas worker (one of my few regrets is declining an offer of part-time work in a canvas shop on Long Island....) - so there may be better ways to accomplish a similar project. However, I have sewn miles of seams in custom canvas over the years - so this information may be helpful to other DIYers.
The customer initially asked me to paint this motor but I suggested this canvas alternative. There are 2 main benefits to canvas - in addition to the obvious superior hide. One, you retain the trade-in value of the motor if you want to swap it out for something else. Second - more important in my mind - having a motor that will flare birds persuades one to take the few seconds each time you rig the boat to cover the motor. I hunted with a white Johnson for many seasons. Unless there was lots of snow around. the motor got covered every time. I concede that wet covers can be a bit messy but I always just lay mine on the stern deck - so it would drain overboard - when running out to pick up downed birds, etc. (It rides in the cockpit when in transit or storage.)
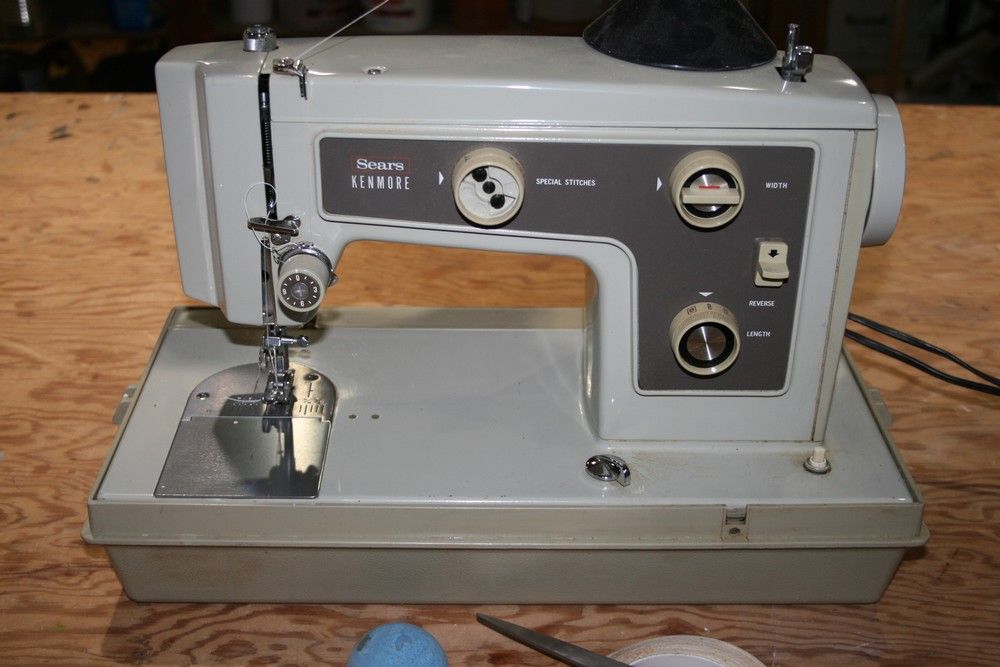
Here are the main tools. The Sears Kenmore is a common, home duty machine - a wedding gift from my parents to Susan and me 40 years ago. Keep it clean, lubricated and use the right needles and thread and you're good to go.
In order to hold a large spool of thread, I had to make a "bushing" from an old mop handle.
Other key tools are sharp scissors, seam ripper, chalk and - VERY IMPORTANT - Seamstick basting tape. Canvas is tough to pin - to hold everything in place while sewing - and this double-sided tape does a great job. The other "worth its weight in gold" item is pre-wound bobbins for the waxed nylon V-92 thread. I buy 10 or so at a time. They save LOTS of time and frustration when the bobbin thread runs out - because they take just a few seconds to switch.
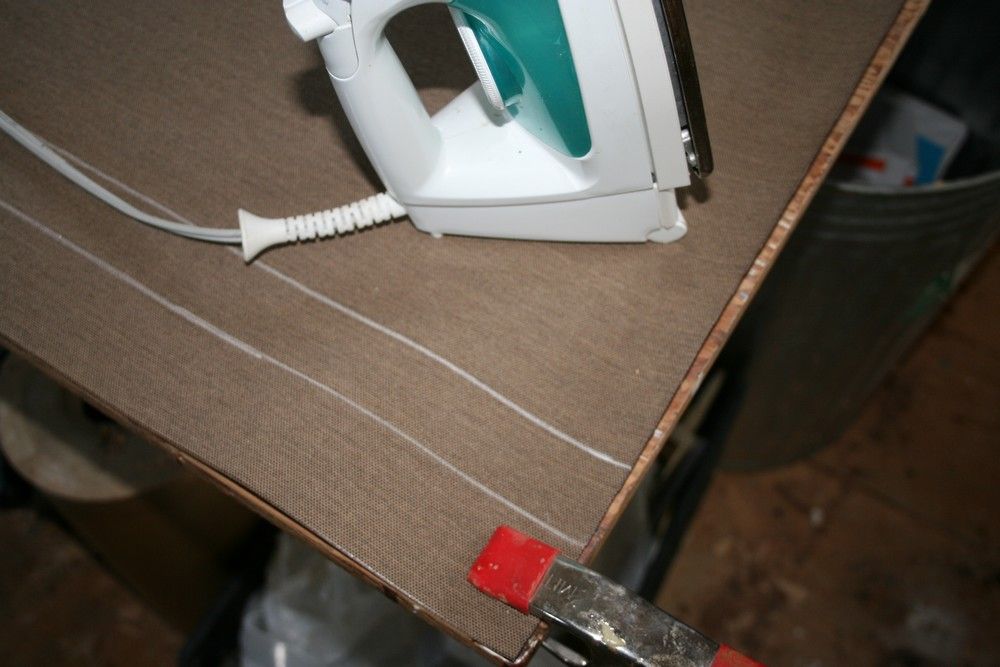
An iron, too, is essential. All the seams should be ironed before going through the sewing machine. Set the temp for "synthetics".
I buy my canvas from either Sailrite (http://www.sailrite.com/) or Sailmakers Supply (formerly Mainland Sails - http://www.sailmakerssupply.com/). Sailrite has lots of helpful information on its website. For example, it can recommend the right needles for your specific sewing machine.
I use Sunbrella Marine Fabric. It is a polyester fabric and comes in 46" and 60" widths. I used the 46" for this project. I tried a new (to me) color: Tresco Birch. I think it's a good match for salt hay. I also like their Tan.
I squared up the canvas, marked a center line, then hemmed the bottom. Spring clamps are handy "helpers" in any one-man shop.
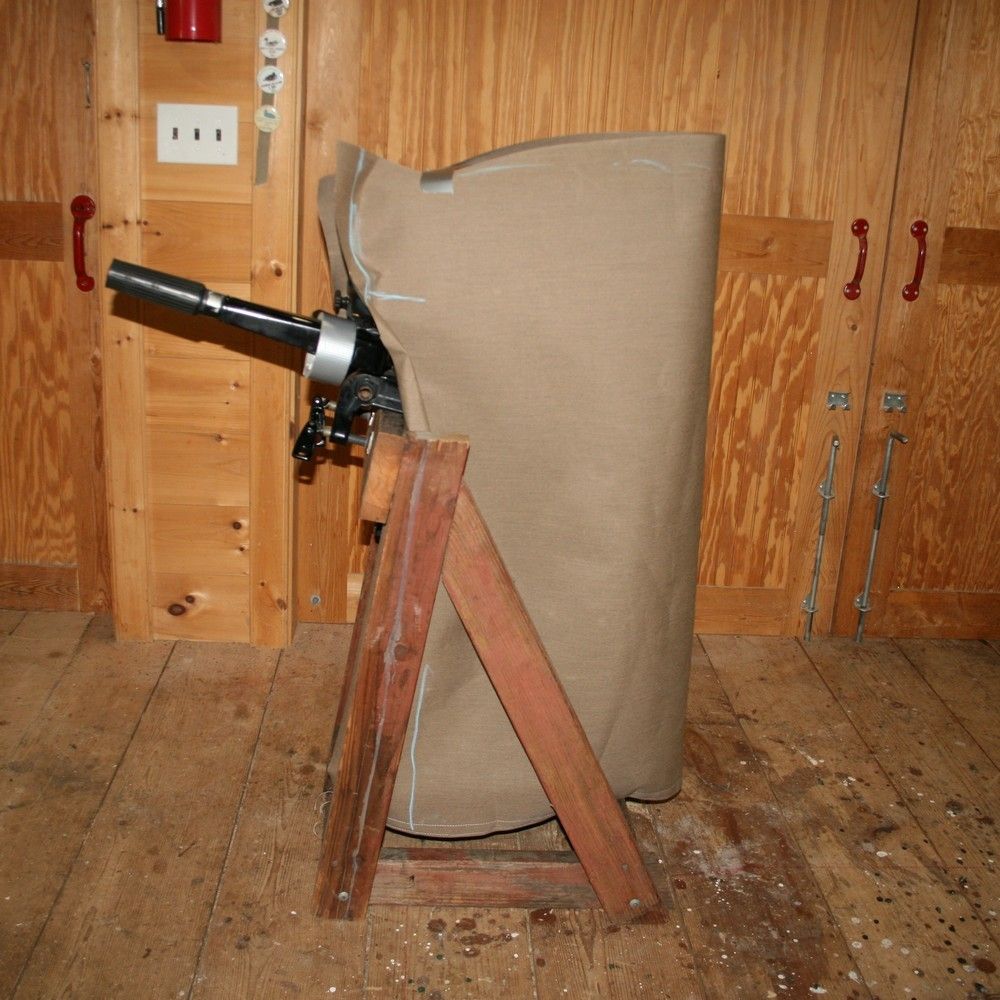
I cut the canvas a bit long and then duct tape it in place so I can refine my design/measurements and mark it. I was scolded by a sailmaker for marking with pencil once - so I now use chalk unless I need bold lines on the inside.
Here it is taped in place. I can now firm up my design and mark the actual dimensions.
The tedious task is sewing the nylon webbing in place. It is much easier, though, to sew it in place BEFORE you sew the cover into its final shape.
I use the Seamstick to tack the webbing in place. I separate the paper from the adhesive with the tip of my seam ripper.
I use the handle of the seam ripper as a seam rubber (I have a real seam rubber somewhere....) - to force the adhesive into the weave of the webbing.
Here are the sides (sides and back are a single, wraparound piece) and the top with all of the webbing sewn into place - and ready to be sewn together into a cover.
First I sew the top - across the back - and then the sides. I stop the sides after 20 inches - a bit longer than the motor's "hood". I check it for fit while it is still inside out.
Next, I figure out how I will finish the front of the cover and tie it into the side panels. This is the all-important "doping it out" process I learned from my Dad.
For some reason, this view has me thinking Darth Vader.....
I'm not sure thatching will be necessary on the top - but now was the time to sew the webbing there.
The side panels sweep aft a few inches.
It is long enough to cover the lower unit and prop. But....that black handle needs some attention.
This little sleeve can stay on all the time.
It is open inside to allow access to an adjustment knob (whose purpose I do not know - being an OMC guy....).
Bundles of thatch should be lashed to the webbing every few inches. I like to use a jute twine - it's the right color and is easily cut and discarded with the grass (both biodegradable) after the season.
The bundle below was photographed on one of my Gunning Boxes. A square knot (reef knot to you sailors) does the job.
Hope this helps!
SJS